Showing & Telling: How They Help Control Your Story’s Length

Showing and Telling: How They Help Control Your Story's Length | Learn how to take advantage of showing and telling and use them to manipulate your story's length! #writingtips I don’t know about you, but I’ve always struggled with short stories. I’m definitely a novel kind of girl. But I hated that short stories were getting the better of me–how could I write a 100k word novel no problem but couldn’t manage a 2k word story? It didn’t make sense. Could I figure out how to keep a story short?

Challenge accepted.

Thus began my obsessive study of short stories, which lasted almost a year. And I learned some interesting things not just about short stories, but also about how to control your story’s length in general. I’m about to share with you something it took me months to figure out.

Ready?

Showing helps make your novel long, and telling helps keep your short story short.

Well, duh, you think. It’s so obvious!

It was obvious, and it was something I knew too! Of course it takes more words to show than tell. Yet somehow I had been blind to this fact even though it was staring me right in the face.

The problem was, I was a novelist with a novelist’s mindset. And in novels, telling is usually a big no-no. But the more I studied short stories, the more I was surprised to find that not only is telling acceptable, but it’s one of the necessary elements to  keeping the story short!

Cue metaphorical light bulb.

Now I understood one of the reasons why my short stories ended up being so unwieldy. I was trying to show the reader everything just as I would in a novel, and this was adding length I didn’t want.

How Telling Keeps Things Short

Let’s check out some examples of telling in short stories, shall we?

“The Necklace” by Guy de Maupassant (my favorite short story, give it a read if you have the chance!) opens with several long paragraphs of telling:

She was one of those pretty and charming girls born, as though fate had blundered over her, into a family of artisans. She had no marriage portion, no expectations, no means of getting known, understood, loved, and wedded by a man of wealth and distinction; and she let herself be married off to a little clerk in the Ministry of Education. Her tastes were simple because she had never been able to afford any other, but she was as unhappy as though she had married beneath her; for women have no caste or class, their beauty, grace, and charm serving them for birth or family, their natural delicacy, their instinctive elegance, their nimbleness of wit, are their only mark of rank, and put the slum girl on a level with the highest lady in the land.

This is all information that in a novel, we would show. But it would take pages and pages to do so!  Yet it works. But how does it work?

  1. Guy tells the reader information that is necessary to understanding the story.
  2. He presents the information in a way that is entertaining to read.

This can also be applied to your novel. You might have information the reader needs to know, but it’s not important enough to spend pages or chapters showing it. So what do you do? You tell them. But you don’t have to do it in a way that’s boring–use tone, similes, and word choice to make it entertaining!

Let’s look at one more example, “The Lottery” by Shirley Jackson:

Soon the men began to gather. surveying their own children, speaking of planting and rain, tractors and taxes. They stood together, away from the pile of stones in the corner, and their jokes were quiet and they smiled rather than laughed. The women, wearing faded house dresses and sweaters, came shortly after their menfolk. They greeted one another and exchanged bits of gossip as they went to join their husbands.
Here we are “told” what the men and women are talking about, whereas in a novel we would show this with actual dialogue. However, it works because this is all the information we need in the limited space of a short story.

How Showing Adds Length

Now, let’s switch gears. How does showing help add length to your novel?

When you show the reader something, you’re forced to use more words and page space. Telling is like a peek behind the curtain. Showing is like a backstage tour.

You could tell us Erin and Seth went on a date and had a wonderful time. Or you could show us by writing out the whole scene and letting us experience it with them.

You could tell us Erin and Seth fall in love and are crazy about each other. Or you could show us through scenes that reveal this information through their actions and words.

You could tell us Erin was upset when Seth cheated on her. Or you could show us how she found out and let us feel her pain.

Getting the idea? If you’re having a hard time getting your story novel-size, you may be trying to tell the reader too much and not showing enough. Let’s look at a quick example:

Telling: Erin was devastated at Seth’s betrayal.

Showing: Alone at last in her bedroom, Erin lost control. She fell to her knees and clutched at her hair, rocking back and forth. How. How could he do this to her? Her heart throbbed within her chest and her back shuddered with her sobs. Had everything been a lie? Had he ever loved her? Her tears dripped onto the frayed carpet. How could she have been so stupid? She should have known.

Showing gets you up close and personal with the viewpoint character, and reveals more details than telling allows. If you keep this up throughout an entire novel, you’re going to add a considerable amount of length!

Need More Techniques?

So how did I fare with my short story challenge? Not only did I finally manage to write a short story of appropriate length, but I also succeeded in getting it published. Not bad, right?

Even better, I’ve taken everything I learned from my journey and created an epic workbook to help you out! It’s called “The Epic Guide to Growing Your Idea Into a Novel-Sized (Or Short) Story.” 

If you’re wondering how to keep a short story short or how to fill up a novel, this workbook is for you!

I break down the process of taking an idea and turning it into a story, and share the techniques you’ll need to achieve the length you want. Plus, it has accompanying worksheets to help you through the process. This is stuff it took me months of studying and analyzing to figure out!

You can learn more and purchase your workbook here for only $5! (Seriously, I wish I’d had this guide when I first started trying to figure this out!).

I truly feel that the information in this book is worth more than the $5, but I intentionally wanted to keep the price low for all of you new writers uncertain about investing a lot of money in your craft. I feel you, my friend, I’ve been there.

What are your thoughts? Do you use showing and telling to help control the length of your story? Leave a comment below, I’d love to hear from you!

signature

Guest Post: How Creating Strong Characters Can Help You Build Your Plot by Kristen Kieffer of She’s Novel

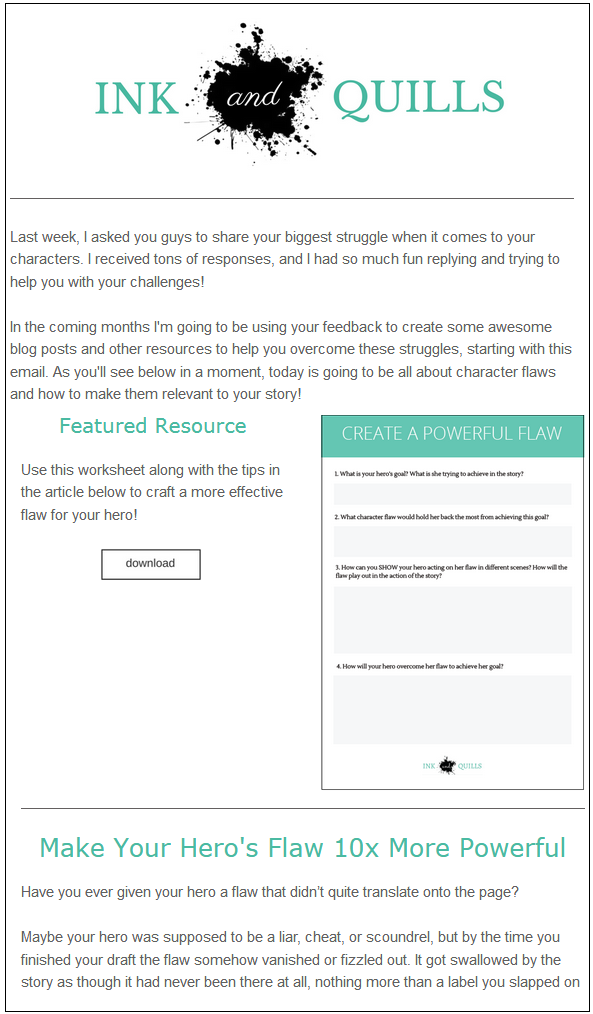
Learn how strong #characters and your #plot go hand in hand! Plus, a free workbook!Today I have the pleasure of welcoming the lovely Kristen Kieffer from She’s Novel to the blog for an epic guest post! She’s even created a shiny workbook to help you through all info, which you can download for free by clicking here. Ready to get started?

line divider

What’s more important: characters or plot?

This age-old question has been a source of debate among writers for decades. But let me ask you this: do characters and plot have to be exclusive? Do we have to say that one is more important than the other?

Of course not!

In fact, I’m a firm believer that it is your characters’ stories that actually make up your plot. Their actions and experiences are what drive the novel forward. To say that one is more important than the other is like saying that peanut butter is more important than jelly in the making of a PB&J.

It just doesn’t make sense!

If your characters’ actions make up the plot, then you’re going to need great characters to write a story that will keep readers turning pages. But how exactly can you craft spectacularly memorable characters?

While some factors may depend on your character’s role in the story, there are three things that every character should have. Let’s break them down, eh?

3 Things You Need to Create Strong Characters

1. A Goal

Your character’s goal is the one thing that they are trying to achieve. They believe that attaining this goal will bring them success and happiness, though sometimes what they think they want and what they actually need will be different.

Your characters need strong goals because goals are what drive them to action. They want something, and they are going to take steps to attain it. And should someone stand in their path to success, you can be sure that your character will jump into action, seeking a way to overcome their obstacles.

Simply put: by giving your characters each a clear goal, you are setting yourself up for easy plot production.

 2. A Motivation

Your character’s motivation is the why behind their goal, the reason they are taking action. It’s important to give each of your characters strong motivations as well as strong goals for two main reasons.

  1. A) Motivations reveal who your characters are at heart. They make the good guy realistic and the bad guy sympathetic. They help readers see that your characters are more than just a role to be fulfilled, that they are indeed – in the space of your novel – real people.
  1. B) Some characters, such as your hero and your villain, may have the same goal. Giving each character vastly different motivations will help readers identify the protagonist and the antagonist.

3. A Personality

Having strong goals and motivations will make your characters’ actions interesting, but plots aren’t always made up of action. They also contain interactions between different characters. The ways in which your characters treat one another during these interactions will be determined by their personalities.

When crafting a personality for each of your characters, make sure to give them more than one trait. Characters who are always cheery (or angry or sad, etc.) make for very boring, shallow characters. Don’t settle for that!

Once you’ve chosen a few personality traits, decide when each of those traits comes in to play. If your character is prone to anger, what sets them off? If your character is silly, what makes them laugh? Repeat this process for each of their traits to discover exactly how your character will act in every situation they encounter.

Building Your Plot

Now that you’ve crafted strong characters, it’s time to use their stories to build a plot!

Using only the goals, motivations, and personalities of two characters in particular – your hero and your villain – you will be able to form a plot outline that you can later expand upon as you get to know your story better.

Let’s break down these eight steps to creating a basic plot.

8 Steps for Creating a Plot

1. Understand Their Goals

You know the goals your hero and your villain have, but do you what sparked their desire to achieve those goals in the first place? Was there an event in their past that introduced this desire or does something happen in the first chapters of your novel that sets them down their path?

Keep in mind, understanding what sparked your characters’ goals isn’t the same thing as knowing their motivations. For example, a character may desire to form a rock band after seeing his favorite band play in concert (that would be the spark), but he may only want to start playing music so that he can become famous (that would be the motivation).

Understanding what sparks your characters’ goals will help you establish the beginning of your novel. The spark encourages your characters to take action, setting the plot into motion.

2. Build a Plan

Your hero and your villain each have a goal, but how do they plan on achieving it? Begin to lay out what steps they would take if everything went according to plan. Of course, this plan won’t go smoothly in the end since you’ll be adding conflict to spice your story up. But knowing what paths your characters would take will help you decide what they will actually do at each major plot point.

3. Give Your Hero an Early Failure

To create riveting conflict, you’ll need to show your readers that the villain is actually quite formidable, so much so that your hero might not make it out alive – literally or figuratively speaking.

To show just how powerful your villain is, have them take a step towards achieving their goal that sets the hero back. This will be your hero’s first failure, and it will force them to change their course. Ask yourself what your hero’s next step to achieving their goal will be, and have them work towards it.

Making your villain’s strength evident as soon as possible will hook your readers in for the long run, while also serving to reveal your hero’s motivation. After all, if your hero wasn’t passionate about achieving their goal in the first place, they would probably quit after this early failure. Make sure your readers know that.

4. Put Their Personalities to Work

At this point in your plot, your hero is feeling a tad defeated while your villain is reveling in their achievement. This is where your characters’ personalities will really come into play. Ask yourself:

  1. How does my hero handle their setback on an emotional level?
  2. Does my hero need help to move forward? If so, how do they feel about asking for help?
  3. How does my villain react to making forward progress?
  4. How does my villain treat others based on their early success?

By working your responses into the plot, you’ll allow readers to get to know your characters on a deeper level, ensuring that they –and, in turn, your plot–remain interesting.

 5. See Some Success

Now that you have established the villain’s power and given more insight into your characters, it’s time for them both to make some forward progress. Your hero and your villain should be working towards their goals at full-steam, and each should see some measure of success.

Their progress should definitely be hard-earned (they may even experience a few small setbacks along the way), but for all intents and purposes they are getting closer to achieving their goals. Which also means that they are getting closer to coming into conflict once again.

6. Test Your Hero

At this point in your plot, readers may be feeling pretty comfortable in your hero’s ability to overcome the villain and achieve their goal. Once again, it is time to test your hero’s mettle by making them fail.

Only this time, your hero’s failure shouldn’t be something that merely sets them back. This failure should be massive, something that makes your hero seriously consider quitting their journey altogether. The loss they experience should call their motivations into question, making them wonder if anything they have done thus far has been worth the price they have had to pay.

This not only skyrockets the tension in your novel skyrocket, but opens up the opportunity for you to give your hero some emotional development, as well as to reveal what they truly need to find success (compared to what they’ve been chasing so far).

This is also the place where readers finally get to know the most raw, vulnerable version of your hero, where their true personality becomes more evident than ever.

7. Enter the Climatic Tension

Whether your characters have been chasing individual goals or the same goal for individual reasons, this is the point where they come into final conflict with one another. And it should be epic!

Neither character should be able to take another step towards achieving their goal because the other stands directly in their path to success. As a result, someone’s dream will be completely shattered by the time the conflict ends. All of your hero’s and villain’s actions are hanging on this one final thread, and there is no turning back.

8. The Resolution

The climax is over, and it is now revealed which character will achieve their goal. But do you know how they do it? In some stories, defeating the villain will be your hero’s singular goal (or vice versa), while in other stories, defeating the villain is the last stepping stone in your hero’s path to success.

If they haven’t done so already, now is the time for your character to finally achieve their goal.

This is also the point where we learn how the action thus far had affected your character. Are they the same person in the end of the novel as they were in the beginning? Have they changed for better or for worse?

Use this last portion of your plot to wrap up your main character’s story, revealing how they finally achieved their goal and how doing so shapes the rest of their lives.

And, voila! In eight simple steps, you’ve learned how giving your characters’ goals, motivations, and personalities can help you craft a powerful and memorable plot. Do you agree that characters are the backbone of a novel? How have your own characters shaped your story’s plot?

About Kristen

kristen kiefferKristen Kieffer is the creative-writing coach behind She’s Novel, where she helps writers craft novels that will endear readers, excite publishers, and launch their writing careers.
Her latest creation, The Novel Planner, is a daily planner designed specifically with authors in mind. Kristen also loves coffee, geeking out over Tolkien, and editing her upcoming medieval fantasy novel, The Dark Between. Want to know more? Click here!

The Do’s and Don’ts of Character Bios

The Do's and Don'ts of Character Bios | Learn how to #write a solid #character bio without going overboard on unnecessary details. Plus, a FREE worksheet!I love getting to know my characters–it’s one of my favorite parts of writing a story. But it wasn’t always that way! When I first started writing, I stressed out so much over creating life-like characters. Just how much did I need to know about them? I thought that in order to make my characters realistic I needed to know everything about them. And I mean everything.

Have you ever seen those lengthy character questionnaires with endless questions like “what’s his favorite color?” or “what’s in her purse right now?” or even “what color underwear does he wear? Boxers or briefs?”

I’m not making this stuff up, people. (Okay, well maybe I am a little). But seriously, I hate all those lists of silly questions. They’re such a waste of time! And I used to think that I needed to answer them all in order to get to know my character. Oh, naivety.

Some of those questions may be interesting and give you insight into your character, but let’s be real here, how much of that information are you actually going to use? And more importantly, how much should you use? You may not realize it, but having too much information about your character can do more harm than good!

The Cons of Questionnaires

How so? Because you when you fill out those sorts of bio questionnaires, you end up with loads of unnecessary information. Which does not bode well for your novel. When you create a character bio, you only want information that is relevant to your story–everything else needs to go.

If you have all of these extra details you find interesting but have nothing whatsoever to do with your story, you’re going to be tempted to find ways to try to cram them in. You might add in random scenes or subplots to show this information, but you will only succeed in confusing the reader. They’ll wonder where you’re going with that, and how it’s important to the story.

The answers is nowhere and not at all. But see, that’s how a reader’s mind works–they trust that everything you’re telling them is relevant in some way to the story, and if it is not important now it will be of importance later. If the reader turns the last page and realizes that one scene where Ben showed off his martial arts skills actually wasn’t of any importance of all, they’re going to feel cheated and lose trust in you.

The Secret to a Focused Bio

So how do you create a character bio that works without going overboard (thus saving you time and headaches)? You need to focus on two main points: the origin of your character’s internal issue, and his goal/motivation.

“That’s it?!” you asked, bewildered.

Can it really be that simple? Yes, yes it can. Okay, so yes, you’re going to explore other things like flaws, strengths, personality traits, etc. but these two points are the guiding lights that are basically the basis for your whole story.

Let’s look at an example.

In Frozen, we see how Elsa’s parents feared her powers and taught her that she should hide them and pretend like they weren’t there. This childhood experience is what creates her internal conflict: her struggle with controlling her powers and her shame of being different. Her goal in the story is to let go of everything she’s tried to suppress and finally embrace herself and her powers. These two things are not only the basis for Elsa’s character, but also the plot of the story!

So what are some do’s and dont’s for creating a solid character bio that doesn’t go overboard?

The Do’s

1. Focus on your character’s arc. Your story is essentially about how your character changes as he tries to achieve his goal. Your character bio should focus on what your character was like before the change that will take place in the story. This usually revolves around the internal conflict. For example, is he prejudiced now but will become accepting by the end of the story? Dig around and found out why or where this started.

2. Give every major character a bio. Yes it’s a lot of work, but it’s important work. You need to understand what makes all of your characters tick, what they want, and what’s motivating them. Of course you won’t need to go as in-depth for minor characters as opposed to main characters, and not everything will make it onto the page, but you need to know it in order to make them realistic.

The Don’ts

1. Don’t hold back. Don’t shy away from getting into the psychology of your character. Explore their past and unearth their secrets, sins, and skeletons. What are they hiding that they don’t want to tell you? Dig deep and make them talk.

2. Don’t try to write your bio like it’s your novel. Forget perfection. No one is going to see this except you, so who cares if it’s a hot mess? Scribble, use brief notes only you can decipher, jump around all over your character’s timeline. Anything goes.

What’s your opinion on character questionnaires? What methods do you use for creating your character bios?

signature

Does Your Hero Have an Opinion?

Does Your #Hero Have an Opinion? | Your hero's opinions are an important part of his #characterization. Learn what sort of opinions to share and how to show them! “So what did you think?”

We love asking this question to friends, family, and even new acquaintances. Whether it’s about a movie, TV show, book, restaurant, place, concert, or event, we enjoying hearing people’s answer. But why?

We want to know how they experienced it. We want to know their opinion.

Again, why?

Because sharing our experiences brings us closer together, and our opinions reveal more about who we are and our perspective on the world. Everyone experiences things differently, and everyone has a different opinion. It’s in our nature to be curious about what others are thinking and how they see things.

Think about it. Why do we go to the movies with friends? Isn’t it kind of silly? You’re sitting in a dark theater where you can’t talk to each other, so why not just go alone? Because we enjoy having another person there to share the experience of the story.

But perhaps more importantly, after the final credits have rolled we can’t wait to swap our opinions about what we’ve just seen. What did you think of the actor? The special effects? The storyline? We love knowing people’s opinions!

So let me ask you: what are your hero’s opinions? Do you reveal them throughout the story? If not, you should! Let’s examine the why, what, and how of showing your hero’s opinion.

Why Show Your Hero’s Opinion?

Showing your hero’s opinion is an excellent way to develop his character. This will add another layer of depth that will make him even more realistic.  It also helps your readers get to know who he is and starts to create a bond. His opinions will not only reveal how he sees the world, but will also shape the tone and personality of the writing.

What Opinions Should You Show?

Here’s the crucial bit: only show us your hero’s opinions on things that are relevant to the story!

If government plays an important role, show us his opinion on the government. If his teacher plays a role in a scene, show us his opinion of her. But don’t give us his opinion on things like bubblegum and kittens that have nothing to do with who he is or what’s happening in the story!

Be sure to give us his opinion about any new experiences, events, people, places, etc. he comes into contact with during the story. You’d be surprised how many writers forget to do this!

For example, let’s say the hero finds himself in a top-secret government department that covers up the existence of aliens. He acts surprised for a moment, but then keeps charging headlong through the action of the plot. Wait. Pause. I want to know what the heck the hero is thinking about all this! What is his opinion? Get into the habit of showing your hero’s internal as well as external reactions!

Ultimately, what opinions are and aren’t important is for you to decide. Just remember to keep it relevant!

How Do You Show Your Hero’s Opinion?

If you’re writing in first person this one is easy–you just say what the hero is thinking. But if you’re writing in third person it’s a little trickier.

When you’re writing in third person, try to remember to filter everything through the hero’s point of view. This means the words, similes etc. that you use to describe what your hero is seeing and experiencing should be ones that he would choose himself. Word choice is a more subtle expression of opinion–it lets you know how the character feels about something without actually coming right out and saying it.

You’re also going to want to share what your character’s opinion through their thoughts. Italics work and is what many writers use, but I’m not a fan of them. I think they show the author’s hand in the story and create distance between the reader and character. I prefer weaving the hero’s thoughts right into the narrative. I’ve written an in-depth post on how to do this, which you can read here.

Showing your hero’s opinion is all about looking inward and remembering to balance the external and internal. However, it’s important to keep in mind that your hero’s opinion is more than an emotional reaction–his belief itself will shape his reaction.

Best of luck with your character crafting!

signature

Are You Making These Point of View Mistakes?

Are You Making These Point of View Mistakes? | Two #POV mistakes you want to avoid in your #story!Point of view is important to your story, and it must be established immediately. Why? Because the reader needs to know whose “head” they’re in, whose story this is. Your hero is the reader’s access point to the story. They will experience the story along with the hero–through his or her point of view.

There are a couple mistakes I’ve seen made frequently with point of view, especially by new writers. I think these come from the writer trying to do too much and trying to show the reader everything.

But that’s the thing about POV–you can’t show the reader everything. To understand what I mean, let’s examine these two POV mistakes.

Mistake #1: Head Hopping

When you’re writing a scene, make sure you only stay in one character’s head at a time. Switching back and forth between characters is known as “head hopping” and it’s jarring to the reader.

So what does this look like? Here’s an example:

Melissa wondered why Tom had asked her to meet him in the middle of the night. She leaned against the tree at the edge of the park, watching him approach.

“Hey,” she said, “Is everything all right?”

Tom took her hands in his. How could he tell her what was happening? He didn’t want to frighten her. “I’m fine. Listen, I need you to leave town for a few days.”

“What do you mean? Why?” What was going on, Melissa wondered.

“I just need you to trust me,” he said, hoping she wouldn’t argue. “Take this.” He pressed the train ticket he had purchased that morning into her hand.

Melissa shook her head. She wasn’t going anywhere until she had answers. Tom saw the look on her face and knew she wasn’t giving up easily.

***

It’s like watching a ping pong match, isn’t it? We keep switching back and forth between Melissa and Tom’s head, and not only is it disorienting, but it’s boring.

But why is it boring?

Because we’re being told everything. There’s no work left for the reader. There are no blanks for us to fill in, nothing for us to guess at or wonder. The writer has unintentionally deprived the reader of one of the joys of reading.

When we’re in one character’s head at a time, we’re constantly trying to interpret and figure out what the other character is thinking and feeling by judging their body language, dialogue, and whatever other clues the writer might provide. There’s something tantalizing about trying to figure out the puzzle of a character.

I think writers fall into this habit of head hopping because they want to let the reader know what each character in a scene is thinking/feeling. But it’s just not good having too many characters sharing the stage at once–after a while we may wonder whose story this even is.

Now, of course this doesn’t mean you can’t use more than one POV in your story. Stories with multiple POVs  are fantastic! The rule is to stay in one character’s POV per scene. If you want to change POV, then you need to switch to a new scene.

Mistake #2: Showing the Same Thing Twice

When you’re writing a story where you’re switching back and forth between multiple POVs, there’s one mistake you’re going to want to avoid: Never show the reader the same thing twice. What do I mean by this?

Let’s say you have a scene in which Sarah wins her swim meet competition. Then we switch to the next scene, which is from her boyfriend Matt’s POV…and it shows him watching her compete. We already know the outcome of the competition–we experienced it from Sarah’s POV–so we’re not going to care what happens here.

Never show the same scene from two different POVs. It’s going to kill your story’s tension and momentum. Yes, each character will see and experience it differently and this may be interesting to you, but it’s going to bore your reader. You’re just going to sound repetitive, and the reader is going to start skimming (harsh, I know). But we read because we want to know what happens next, not what has already happened.

As a writer, you have to choose from whose POV it’s best to show each scene. This isn’t easy, and I know it’s tempting to show both, but don’t. You can’t show the reader everything and you shouldn’t–you need to place trust in her that she can fill in the blanks.

Have you made either of these POV mistakes in your writing?

signature

How to Write Your Character’s Thoughts

Confused about how to #write your character's thoughts? Learn how to bring readers inside your character's head.At some point in your story, you’re probably going to want to let the reader know what your protagonist is thinking. Sharing your hero’s thoughts helps us get to know him better and brings us closer to him. But when you come to that moment you hesitate.

How are you supposed to convey your character’s thoughts on the page? Do you use italics? Quotation marks? End them with the speech tag ‘he thought’?

No, no, and no.

Quotation marks should be used only for words being spoken aloud. The most common method I’ve seen for setting apart thoughts is the use of italics. “He/she thought” at the end of a thought is also pretty common. These methods are alright.

But there’s a better way.

Using Writer Magic to Convey Thoughts

A truly skilled writer can convey his or her character’s thoughts in a way that draws us right into the character’s head without distracting italics or speech tags. “What is this witchcraft?” you ask. Well, let’s take a look.

Example 1:

Kali hurried though the village. She wondered if he was already waiting for her. She lifted her skirts and leapt over a puddle. She knew she should have left earlier, but her mother had kept on talking about the chickens. Sweat trickled down her neck and she wiped it away. She ran a hand through her disheveled hair and wished she had taken the time to fix it before running out the door.

Kali ran past the village outskirts and into the forest. They really needed to find a better meeting place, she thought. When she reached the oak tree and saw Liam standing there her heart fluttered. He’s the only secret I’ve ever had.

Example 2:

Kali hurried through the village. Was he already waiting for her? She lifted her skirts and leapt over a puddle. She should have left earlier, but her mother had kept on and on about the chickens. Chickens this, and eggs that. Be sure to this, don’t do it like that. Kali had been fidgety with impatience and couldn’t much remember the details. Hopefully they weren’t too important.

Sweat trickled down her neck and she wiped it away. She ran a hand through her disheveled hair. Saints! Why hadn’t she taken a moment to fix it? Perhaps he wouldn’t notice. Boys usually didn’t notice things like that…did they? Kali ran past the village outskirts and into the forest. They really needed to find a better meeting place, maybe over by–

She reached the oak and saw Liam standing there. Her heart fluttered. He was her only secret. And she planned on keeping him.

Over exaggerated, yes, but you get the point. Notice the difference between the two examples. The second one is more engaging, and brings you into Kali’s head more than the first one with all the she wondered, thought, etc. But how? It has more of Kali’s voice–it’s almost as though she is the narrator, yet we stay in third person point of view.

In the second example I took out all of the she wondered, thought, knew, and italics. Why? Because these are all interruptions by the author. They reveal that there’s a puppet master pulling the strings. In the second example I shut up and let Kali speak. I stayed invisible. And that brings the reader closer to the character, allowing them to slip right into her mind.

The Problem with Speech Tags and Italics

Speech tags and italics form a barrier between the character and the reader. Don’t try to separate your character’s thoughts from the narrative. Instead, blend them together seamlessly by filtering everything through your character’s voice. How does  she see the world? Allow her thoughts and opinions to shape the narrative.

I think a lot of writers use speech tags and italics because they’re afraid their readers won’t know what is a thought otherwise. Don’t underestimate your readers’ intelligence! Don’t try so hard to make them “get it.” Readers are smart and can figure things out.

Now, some of you might still be clinging to the italics. “Why can’t I use italics? If the character is speaking in first person doesn’t that draw the reader into their head?” you ask.

Well, there’s certainly no rule that says you can’t use italics. But here are my reasons not to. #1: It can be jarring and somewhat disorienting switching back and forth between third and first person. #2: It still separates the reader from the character, letting us only see her thoughts when you want us to. #3: It prevents you from getting into the habit of using a blended narrative, because you will always want to show thoughts in italics. The story will then likely be told in more of your voice than the character’s.

Distance or Proximity?

Now, these aren’t necessarily bad things. It depends on the story you’re writing. You may want to write a story with an omniscient third person point of view that puts more distance between the reader and hero. It’s up to you!

I have used italics in the past, but I decided that the technique of blending the character’s thoughts into the narrative works better for the stories I tell. I want to bring my readers as close to my hero as possible. I want to tear down all the barriers.

How do you convey your character’s thoughts? Do you think you will try to cut out italics and speech tags?

signature


How to Create a Likable Hero Readers Will Pull for

How to Create A Likable Hero Readers Will Pull For | Is your #hero likable? If readers don't love your hero they won't care what happens in your story.Your characters are the most important part of your story, more so even than the plot (though that’s important to!). So you need readers to like your hero. If the reader finds him repulsive, well…she’s not going to stick around to find out what happens to someone she doesn’t care about!

Have you ever read a book where the main character was unlikable? You really really wanted to get into the book, the plot was interesting and so were some of the other characters, but the hero was just…ugh. Is there anything more frustrating?

So how do you keep readers from hating your hero? Well, besides making him unique and fully developed, you need to make him likable.

It baffles me how many books I’ve picked up with unlikable characters. A while ago I tried to read Poison by Bridget Zinn. I really really wanted to like the book because I love Fantasy. But I couldn’t get into it because I found the main character, Kyra, very unlikable.

She hated children and animals (including the little piglet in the story), wasn’t very nice to Fred (the love interest and character I did like), and she was trying to poison her best friend to save the kingdom.

The whole time I was reading I kept asking myself, why am I supposed to like this character?

I’m sure Kyra had her reasons, but the problem was we didn’t learn them soon enough. And I didn’t stick around to find out why she thought she had to kill her best friend to save the kingdom–the book went back to the library unfinished.

The thing is, you need to keep in mind how a story functions. A story is basically about a character who wants something, and their journey to get it. You want the reader to like the character and cheer him on towards his goal. That’s what keeps the reader hooked–wondering if the character she loves will manage to succeed in his goal. But if the reader finds the character unlikable, she won’t care whether or not he succeeds.

Now, I have a bone to pick with my fellow writers about female characters. I have a really hard time finding female characters I like, because I find so many of them unlikable. Why? It seems that authors try so hard to make their female characters strong, that they end up making them come across as heartless jerks instead. Ironically, in trying to make the character likable by making them a tough bad ass, they actually end up being unlikable.

Now, this does not mean that your hero has to be perfect! (That’s something you don’t want). Your hero should have flaws, but still have traits that make him, well, the hero. Heck, your character can even be a grumpy pessimist and still be heroic. “Wait,” you say, “I thought I’m supposed to make him likable! How can a reader like a grumpy pessimist?”

That’s the interesting thing–by giving a character certain redeemable qualities, you can make the reader like him even if he’s not the friendliest sort.

Take Katniss from The Hunger Games for example. She’s not very sociable, hates her sister’s pet cat, and can be prickly. But we love her. Why? Because we see good qualities in Katniss. She loves her sister and volunteered to take her place in the games. She also cares for people–Gale, Peeta, Rue, Cinna, and even Effie. These are traits we can admire, and they balance out the qualities that otherwise might make Katniss unlikable.

Readers need the hero to be likable in some way. No one wants to read about a total jerk. Early on, you need to show us that your main character possesses heroic qualities, that there is something good about him.

Here are some techniques for creating a likable character your readers will pull for.

1. Create sympathy. Give us something that will pull at our heartstrings and put us on your hero’s side. Is he an orphan? Is he living in poverty? Was his brother murdered? Was he unjustly accused of something he didn’t do? A sympathetic quality can work wonders.

2. Let us empathize. Give him qualities that we share and can understand so we can be like, oh I feel you, or damn, I’ve been there. This allows us to make a connection with the hero and helps us bond with him. For example, think of Ron Weasley and Harry Potter–they hated doing homework and were always trying to find shortcuts or ways to avoid it. It was funny and we could feel their pain because we’ve all been there!

3. Give them positive traits–and show them in action. Make sure you give your hero positive traits to balance out his flaws, like honesty, compassion, loyalty, bravery, etc. But it’s not enough to just tell us that your character is good and brave. You need to show his good qualities in action. Maybe he stands up to a bully or saves a puppy from getting hit by a car. Let us see that he isn’t all talk!

4. Give them likable traits. Similar to the above, but not quite the same. I’m talking about things like charm, wit, humor, passion, skills, and quirks. You know, the kinds of things that make a character interesting, irresistible, and fun. The kinds of things you would look for in friends you want to hang out with.

5. Let us know who admires or looks up to them. Who admires your hero and why? Let us know and we will be more likely to admire him too. For example, in The Hunger Games, Prim looks up to Katniss, and the way Katniss cares for her makes us like her more.

6. Reveal the cause of their flaws. If you give reasons for your hero’s flaws it will make readers more understanding of them, and more likely to be forgiving or sympathetic. Why can’t your hero trust or open up? Why does he lie? Why is he so pessimistic? You don’t have to have a reason for every flaw, but for bigger or more serious flaws it can be helpful.

So now that we’ve covered the dos, how about a few don’ts? Here are some things that can make your hero unlikable:

  • always whining/complaining
  • cowardly
  • two-faced
  • hypocritical
  • heartless, doesn’t empathize with others
  • constantly argues/fights with others
  • treats others poorly
  • selfish/self-centered
  • always seems to be a helpless victim

Create a hero who is liked by others in your story and who you would want to be friends with, and your readers will like him too. Or, if you decide to go with a hero who’s rougher around the edges, make sure to give him a redeemable quality early on so the reader will root for him!

Have you ever accidentally created an unlikable hero? What makes a character unlikable for you as a reader?

signature

What Writers Need to Know About Archery

What Writers Need to Know About #Archery | Have an archer in your #story? Here's what you need to know to make sure your scenes are realistic! Plus links to additional sources for your research! Archery is really popular right now. Pop culture is full of archers–Merida, Legolas, Haweye, the Green Arrow, and Katniss Everdeen. If you’re a fantasy writer, odds are you probably have an archer in your story.

If you’ve never shot a bow or don’t know much about archery, this is the guide for you! Details are the key to making your story vivid, so it’s important to get them right. That’s why you need to learn all you can about archery to avoid making embarrassing mistakes readers might catch.

I’ve been practicing archery for several years now and have also done quite a bit of research for my current novel-in-progress, so I thought I would share some of my knowledge with my fellow writers 😉

(Also, if you have archery in your story I’m betting there’s a good chance you probably have horses too. You can check out my writer’s guide to horses here).

Ready for an archery lesson? Let’s begin!

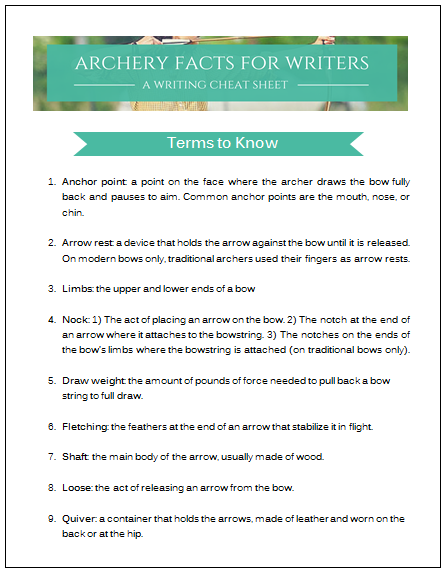
Archery Terms

Anchor point–a point on the face where the archer draws the bow fully back and pauses to aim. Common anchor points are the mouth, nose, or chin (I use the corner of my eye, it doesn’t really matter what you use as long as you’re consistent).

Arrow rest–a device that holds the arrow against the bow until it is released. On modern bows only, traditional archers used their fingers as arrow rests (see above photo).

Limb–the upper and lower ends of a bow

Nock— 1) The act of placing an arrow on the bow. 2) The notch at the end of an arrow where it attaches to the bowstring. 3) The notches on the ends of the bow’s limbs where the bowstring is attached (on traditional bows only).

Draw weight–the amount of pounds of force needed to pull back a bow string to full draw.

Fletching–the feathers at the end of an arrow that stabilize it in flight.

Shaft–the main body of the arrow, the wooden part

Loose–releasing an arrow from the bow.

Quiver–a container that holds the arrows, made of leather and worn on the back or at the hip.

What Writers Need to Know About Archery

tomsawyer(Why yes, this is me shooting my bow while wearing a dress. Because I’m a badass like that).

1. You can only hold a draw for so long with a traditional bow. I think people forget about this because many archers nowadays use modern compound bows (like the one I’m using above). These types of bows use a gear and pulley system, and are designed to hold the weight for you when you’re at full draw. That means you can hold your draw for ages without tiring.

However, with traditional bows you’re holding that weight all on your own. If you have an English longbow with a 120lb draw weight, that means you are pulling back 120lbs and holding it there.

It’s not going to take long for your arm to start to tire and shake! Shaking is not good for aiming, so archers won’t draw their bow until they’re ready to shoot and won’t take long to aim. So don’t have your character start a lengthy dialogue with her bow drawn!

2. Archery takes practice and strength. Consider your character. What is your character’s age, size and strength? What sort of bow are they using? How long have they been practicing archery? These are all important questions to answer.

A small character with little archery experience won’t be able to shoot a 120lb war bow. But they might be able to handle a recurve or smaller hunting bow with a lighter draw weight. It takes many years to get good at archery, so if your character is a skilled archer make sure he didn’t just pick up a bow yesterday!

3. Don’t have your characters “fire” their bow. In medieval times, the word “loose” or “release” was used when commanding archers. The term “fire” is more modern and relates more to guns and cannons.

So the commands for archers in battle would go: Nock, draw, loose! Also, going back to #1, make sure your generals aren’t having their archers holding their draw for extended periods of time!

4. Shooting a bow is tiring. Especially if you’re firing one arrow after another after another. Of course, if your character is a practiced archer he will have good strength and stamina. But if he is pushed beyond what he is used to, say in a battle, for example, he will grow tired and/or sore. Especially if he has a bow with a heavy draw weight.

Also, pulling back a bowstring with a heavy draw weight continuously will begin to hurt your fingers. Your character may build up callouses over time, but most archers wear a glove to protect their hand if they’re going to be shooting for long periods of time. My bow is only 20lbs, but when I’m out practicing for a long time I’ll wear a glove because I know the string will begin to hurt my fingers.

5. Bows do not creak. When you draw a bow back, it is silent. The creaking you hear in movies is a sound effect invented by Hollywood. So don’t describe it in your story!

6. Arrows do not whistle. This is another sound effect invented by Hollywood, so steer clear of it in your descriptions! To hear the difference between what it sounds like when a bow is shot in a movie vs. real life, watch this scene from the Hunger Games (listen very carefully for the creak when she draws, it’s muted by the arrow scraping against the metal bow) and then watch this video of an English longbow demonstration. Then, watch this video and pay attention to the sounds you DO hear.

7. Arm guards are important. An arm guard (also called a bracer) is a protective piece of leather worn on the forearm of the hand that is holding the bow. Why? Because when you shoot an arrow, the string can slap your arm.

And it hurts. The higher pound draw weight you have, the worse it will hurt, and it can leave a welt or bruise. Bows used for war or hunting have a higher draw weight in order to be effective in killing, so a character using this type of bow would likely wear an arm guard.

You’ll notice above that I am not wearing an arm guard. That is because I was taught to shoot without one by bending my bow arm very slightly at the elbow. Also, my draw weight is only 20lbs. A couple times in the beginning I forgot to bend my elbow and got slapped and it did hurt, but it wasn’t too bad. Now, if I was using a higher poundage bow I would definitely wear an arm guard! Getting slapped by a string at 120lb would NOT be fun!

8. Traditional bows are unstrung when not in use. Again, I think modern archery has made writers/moviemakers forget that back in the day bows were only strung before they were about to be used. Today’s compound bows remain strung even after use, there’s no fiddling with taking the string on and off. Also, medieval archers always carried an extra bowstring on them in case theirs snapped (which can happen!).

9. You can only keep so many arrows in a quiver. It’s really important to keep in mind how many arrows your character has in her quiver as you’re writing fight scenes. Unless her quiver is magic with a limitless supply of arrows, she’s eventually going to run out. About 25 arrows for a large quiver is a good number, 12 for a smaller quiver.

So what happens when your character runs out of arrows? Well, she’ll have to recollect the ones she fired, grab enemy arrows that might be around her, or resort to another weapon. She should at the very least have a dagger on her in case she is caught in a fight without arrows!

Also consider where she gets her arrows from after she runs out. Was she able to collect her own or other arrows after the fight? Does she make more herself? Does she buy them?

10. Bow types and shooting techniques vary among cultures. You will need to consider your character’s culture when you decide to give them a bow. A Mongolian horse bow is very different from an English longbow. Make sure you know the specific type of bow they’re using.

Also, the archer’s draw varies among cultures. In Western cultures, the Mediterranean draw is the most common, with one finger over the arrow and two fingers under. In Eastern cultures, pinched draws and Mongolian draws are common. (To see what these draws look like, click here).

Eastern archers also use thumb rings to protect their fingers while shooting, as a Western archer would use a glove. Additionally, Western archers place their arrows on the left side of the bow, while Eastern archers place their arrows on the right side.

Now, at first glance you may have assumed that the bow in the picture at the very top of this post is an English longbow. Though it is long, it is actually a Japanese yumi hankyū (half bow). The yumi daikyū (great bow) is the longer version and is 7-9 ft. long vs. the 5-6 ft. of the half bow.

So how could I tell it was a Japanese yumi, since it looks really similar to an English long bow? Well, first the ends of the bows limbs are slightly curved. English longbows have no curve at the ends of the limbs. But the main way I could tell was by the way the archer is shooting.

Notice how the arrow is on the right side of the bow, and she is using a pinched draw–Eastern style. If you look at the picture of me shooting, you will see that the arrow is on the left and I am using a Mediterranean draw–Western style.

So, be sure you pay attention to the culture and the type of bow your character is using!

11. Is your character right or left handed? A right-handed person will shoot a right-handed bow. This means that they draw back the arrow with their right hand and use their left to hold the bow. BUT if your character is left-handed, he will draw shoot a left-handed bow, drawing it back with his left hand. Also, right-handed archers place their arrows on the left side of the bow, while left-handed archers place the arrow on the right. So if you are describing a scene be careful with your rights and lefts!

Getting into Archery

Not only is archery fun, but it’s a great stress reliever! (And I’m not gonna lie, it makes you feel pretty epic). I love it because it’s a combination of physical and mental effort.

Archery is easy to learn (though it takes practice to get good!) and relatively inexpensive. You don’t really need lessons–you learn by practicing, and once you have someone teach you the correct way to shoot you can practice on your own. So all you’ll have to pay for is the equipment.

I bought my bow from a local archery store, where they taught me how to shoot correctly. I would search for archery shops in your area, and when you buy one ask them if they can show you how to shoot it.

If you don’t have any archery stores near you, I would buy a bow off Amazon. Then search for archery clubs in your area, and take a class or two until you know how to shoot correctly. After that you should be good to practice on your own. If you don’t have any archery clubs in your area, search for videos online that teach you proper form. It’s really pretty simple!

I would highly recommend the Gensis bow, which I am using in the photo above. It’s a great beginner’s bow to get your feet wet and start learning archery (and it comes in a bunch of different colors). I’ve had a great experience with mine!

I know traditional bows look really cool, but with a compound you don’t have to mess with learning how to string/unstring it. Traditional bows also come at a higher draw weight (I believe the lowest is 35lb), and since the Genesis has a draw weight of 20lb it’s good for beginners.

Once you build up your confidence (and strength!) you can move up to a traditional bow. I’m hoping to get a traditional bow this year–I think I’m ready to tackle learning how string it, which intimidated me as a beginner.

Helpful Videos on Medieval Archery

And now, for your researching pleasure, a plethora of extra sources just for you 😉

(Also, the guy in the videos below also covers all sort of medieval weaponry, including swords. Check out his channel, he has tons of great info! Plus, he’s British.)

1. What Hollywood gets wrong about bows

2. A point about how bows work

3. Medieval war arrows vs. hunting arrows

4. All about longbows


Additional Links for Your Research

Yes, a couple of these sources link to Wikipedia. Don’t judge–it can be a helpful starting point for research. Look through the sources at the bottom of the article for books or websites to check out.

Want more research help? Don’t forget to check out my writer’s guide for horses here.

Do you have archers in your story? Do you practice archery or want to start learning? If you have any questions about archery (for your story or for you) or about buying a bow comment below or give me a shout on social media, I’d be happy to help!

signature


How to Develop Your Unique Writing Voice


How to Develop Your Unique Writing Voice | Learn what "voice" means in #writing and how to develop your own that will stand out in the crowd.Last week, we looked at the difference between active and passive voice. Today, we’re going to be looking at a different type of voice in writing–your personal voice.

What is Voice?

Voice can be difficult to explain; after all, the term “voice” suggests something spoken, yet novels deal with the written language. (No wonder new writers are so confused!) In the simplest of terms, voice is how you write. Just as you have your own distinctive way of talking, you should also have a distinctive way of writing.

So what do I mean by “how” you write?

I believe that there are two components that make up a writer’s voice: style and perception. I think that style often gets confused with voice. While style does influence your voice, style on its own is not voice. As we will see, there’s more to it. Let’s explore both elements in more detail.

So what exactly is style? It’s your own personal preferences and choices in the way you write. It’s how you say what you have to say. It’s composed of word choice, use of figurative language, metaphors, imagery, etc. Do you use poetic language or are you more straightforward? Do you prefer long sentences or short, choppy ones? Do you use speech tags or avoid them whenever possible?

All of these decisions work together to create your personal style. For example, I prefer to write in a romantic, descriptive style. This means lots of imagery, figurative language, and sensory details. Think of style as a sort of accent for your writer’s voice.

Now, on to perception. By perception, I mean the way in which the narrator of the story views the world. What are his/her opinions, views, attitudes,  thoughts, feelings, beliefs about the world around him? This will influence the narrative. For example, a pessimist will perceive the world more negatively, while an optimist will have a more positive attitude. A soldier will have a different perception of war than a citizen. A child sees the world differently than an adult.

See where this is going?

The narrator’s perception will in turn influence the tone of the writing and give it personality. Now, this brings us to the next important point: Who is the narrator? Is it the author, via third person, or is it the hero via first person?

If you’re writing in third person, your voice will be “louder” than the hero’s. I write in third person, so I have the freedom to describe my character’s world and experiences in poetic language that fits my style, but my hero might not use this language if he were speaking himself. I can also insert more of my own perceptions, which the hero may or may not share.

On the other hand, if you’re writing in first person, your voice will be “muffled” by the hero’s. He will be the one speaking, and all of the perceptions will be his. Some of the stylistic choices such as word choice should also reflect how the character would speak rather than what you would use.

Whether you write in first or third person, the voice should reveal a distinct way of looking at the world.

What Does Voice Look Like in Writing?

Now that you have a better understanding of what voice is, let’s take a look at some examples. We will be comparing style, tone, and perception.

Example #1: Style

Excerpt 1:

“On two chairs beneath the bole of the tree and canopied by a living bough there sat, side by side, Celeborn and Galadriel. Very tall they were, and the Lady no less tall than the Lord; and they were grave and beautiful. They were clad wholly in white; and the hair of the Lady was of deep gold, and the hair of the Lord Celeborn was of silver long and bright; but no sign of age was upon them, unless it were in the depths of their eyes; for these were keen as lances in the starlight, and yet profound, the wells of deep memory.” -J.R.R. Tolkien, The Fellowship of the Ring

Excerpt 2:
“The bill comes on a silver tray. Hodges lays his plastic on top of it and sips his coffee while he waits for it to come back. He’s comfortably full, and in the middle of the day that condition usually leaves him ready for a two-hour nap. Not this afternoon. This afternoon he has never felt more awake.” -Stephen King, Mr. Mercedes

Analysis: Tolkien’s style is more poetic and descriptive. The passage moves more slowly because of the long sentences. On the other hand, King’s style is more sparse and straightforward, and he uses short sentences. Notice also the wording–Tolkien’s is more archaic/romantic, while King’s is more modern. What other stylistic choices do you notice?

Example #2: Tone

Excerpt 1:

“Conventional wisdom says the key to looking good is building your outfit around just one trend at a time. Forget that! Wearing multiple trends at once not only makes you look more stylish, it also stops any one piece from dominating your look. That way the focus stays clearly on you and not just on your trendy new jacket.” –Seventeen Magazine

Excerpt 2:

“The new Coke bottle is part of the company’s efforts to make its containers from renewable ingredients. Coca-Cola debuted “PlantBottle” packaging in 2009, which is 30% comprised of plant materials. The new PlantBottle that Coke debuted this week is its first to be made 100% from sugar cane plastic.” –CNN

Analysis: The tone in the first excerpt is more casual and personable, while the second is more dry and factual. Your tone will depend on your (or your character’s) perception, your audience (are you writing for teen girls or adults?), and what you want to say (are you trying to convey humor or are you writing a horror piece?).

Example #3: Perception

Excerpt 1: “This is how the birth of Jesus Christ came about: His mother Mary was pledged to be married to Joseph, but before they came together, she was found to be with child through the Holy Spirit…[Joseph] had no union with her until she gave birth to a son.” -Matthew 1:18, 25

Excerpt 2: “In those days Caesar Augustus issued a decree that a census should be taken of the entire Roman world…[Joseph] went [to Bethlehem] to register with Mary, who was pledged to be married to him and was expecting a child. While they were there, the time came for the baby to be born, and she gave birth to her firstborn, a son.” -Luke 2:1, 5-6

Analysis: These accounts are two different points of view of the same event–the birth of Jesus. In the first, Matthew focuses more on the virginity of Mary; Luke, on the other hand, focuses more on the location of the birth. Each author focused on the details he thought were most important.

This is why perception is so important to your voice–everyone will notice something different about the same event! This is because we all have different experiences, opinions, preferences, thoughts, and beliefs. Fascinating stuff, right?

Here’s another way to think of it: Three people witness a crime and give their testimony to the police. Each story varies a little, though all three cover the main events. Even though the accounts are different, that doesn’t mean the witnesses are lying–they just each saw the crime from a different angle, thus providing a unique point of view to what happened.

Your job with your voice is to provide a unique point of view on the world and your story’s events.

How Do I Develop My Own Voice?

The best way to develop you writer’s voice is to read a lot and write a lot. There’s really no other way to do it. -Stephen King

I remember being a new (and young) writer and stressing over voice in my writing. I didn’t understand what it was or how to make my writing stand out. Though looking back now, I was probably over-thinking it too much.

Everyone has a voice–you have one right now (although it may still be emerging or developing). Your voice will develop naturally as you write and grow.

I recently attended a lecture with Sena Naslund (New York Times best-selling author of Ahab’s Wife), and she offered some great advice for developing your voice:

Aim not for distinction, but, instead, aim to write well…We each have distinctive ideas about what “writing well” means… Realize that a distinctive voice for a writer emerges from a sense of being a distinct, unique, that is “different” person.

I know a lot of new writers will try to imitate their favorite authors. It’s okay to experiment with and “try on ” different voices as you’re finding you’re own. When I first started writing I imitated J.K. Rowling and used lots of colorful speech tags and adverbs. Now I can’t stand either.

As we learn the craft we will likely imitate our “teachers” (favorite authors). But as we mature and become more confident in our writing abilities, we should start developing our own voice. Please don’t strive to mimic another author–the world needs your voice! We don’t need another Tolkien or Hemingway or Jane Austen. We need you. Because no one can “do you” as well as you can. So why try to write like anyone else?

Write a lot, read a lot, and learn as much as you can about yourself. Grow not just as a writer, but as a person. Discover what stylistic choices you prefer, and discover your thoughts and opinions about the world.

So relax. Embrace your differences. Let your (or your character’s) personality and attitude come through your writing. This is your voice.

What is your writing voice like? Are you in the process of developing it? Has it changed over time?

signature


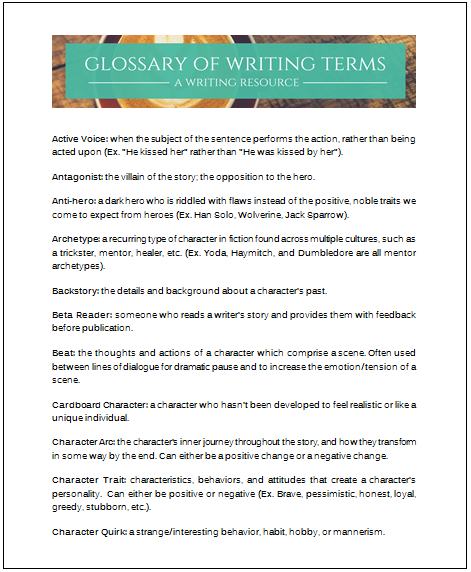
Active vs. Passive Voice

Passive and active voice explained simply, without all the confusing grammar lingo! Learn how to find and correct passive voice to make your #writing stronger. Passive voice. It’s one of those things you’re told to avoid in your writing like showing instead of telling, but what in the world is it? What’s the difference between active vs. passive voice? Why is it so bad? Is it lurking in your writing as we speak?? *ensue internal outpouring of writer worries*

Passive voice can be a confusing term at first, but don’t be intimidated by all the abstract grammar jargon–we’re going to get through this together. Seriously, I’m going to make this super simple for you. You’re going to be a passive-voice-destroying master by the time we’re through!

Now, into the fray!

Active vs. Passive Voice

Let’s start with the basics and define active and passive voice. (Don’t worry, I’m not going to drown you in grammar terms, I promise).

In active voice, the subject of the sentence is doing the action.

Ex: Greer chopped off the goblin’s head with her sword.

The subject (Greer) is doing the action (chopped off).

In passive voice, the subject of the sentence is not doing the action. Rather, it is being acted upon.

Ex: The goblin’s head was chopped off by her sword.

The subject (goblin’s head) is being acted upon (chopped off) by something else (her sword).

Also, it might be helpful for you to consider these similes for passive and active…

Passive: apathetic, indifferent, laid-back, static, uninvolved, docile, idle

Active: alive, operating, functioning, mobile, operating, working

See how these describe the two different types of sentences? Active voice is all like “Step aside, I got this!” Passive voice is more like “Meh, do whatever to me.”

That’s it. That’s all active/passive means. See, not so mystifying after all, is it?

More Examples:

Passive: When the castle was attacked, Will grabbed his bow and ran to the battlements.

Active: When goblins attacked the castle, Will grabbed his bow and ran to the battlements.

Passive: War on the goblins was declared by the king.

Active: The king declared war on the goblins.

Passive: The king was advised that his decision was just.

Active: The king’s adviser assured him his decision was just.

Passive: Funds were approved to raise an army.

Active: The king approved the funds to raise an army.

Identifying and Correcting Passive Voice

So now that you know what passive voice looks like, it won’t be hard for you to find it in your writing. One big red flag of passive voice is by. But sometimes you can have passive voice without the word by, as we’ve seen in the examples above.

So how can you find it? Here are two strategies.

#1: Look for a form of “to be:” am, is, are, was, were, be, being, or been followed by a verb in past tense (usually ending in -ed). So: He was (to be form) offered (past tense verb) the position of general.

#2: If you hate grammar lingo here’s a super easy strategy for you that you might have seen floating around the internet. If you can add “by zombies” to the sentence, you have passive voice. So: He was offered the position of general [by zombies].

To fix passive voice, rework the sentence. You may have to switch things around or delete/add words. Usually you will need to be specific and add more detail: The king offered him the position of general. Make it clear who is doing the action.

What’s Wrong with Passive Voice?

Passive voice technically isn’t a grammatical error. So what’s so bad about it then? Well, it can have some negative effects on your writing. Passive voice can be confusing because it is vague about who is doing the action. It can also sound weak or even awkward, and often uses more words than necessary.

Active voice, on the other hand, is more specific and direct. Use it whenever you can, but also use your judgement. If you have a sentence that sounds really awkward when you try to change it from passive to active voice, it may be an instance where you should break the rule (Ex. “Will was struck by lightening” is fine; “Lightening struck Will” is also fine, but may not work as well in the context of what you’re writing. It depends on which one you want to emphasize–Will or the lightening?).

You are now ready to go forth and conquer the passive voice!

Do you struggle with using passive voice in your writing?

signature