How to Fix Any Plot Hole Like a Pro

Is your novel riddled with plot holes? Plot holes ruin the experience of getting lost in a story for the reader and can make you look sloppy or lazy as a writer. Learn what plot holes look like, how they can accidentally be created, and how to find and fix them!
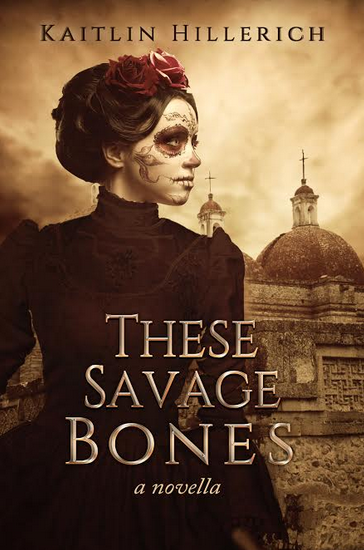
Once, I spent a good three hours trying to fix a plot hole involving a parrot while writing my novella, These Savage Bones.

I wish I was kidding.

There’s nothing that can make a writer want to tear their hair out quite like a plot hole. They can be hard to spot and even harder to patch up. And in the case of a particular species of parrot, which turned out to be extinct during the time period my story was set, they can make you question your sanity.

Argh, headaches for days!

Are there pesky plot holes hiding in your story right now? Let’s take a look at the different forms plot holes can take, how they can be accidentally introduced into a story, and how to rid your novel of them for good.

What is a Plot Hole?

Before you can fix your novel’s plot holes, you must first have a clear understanding of just what a plot hole looks like. Funnily enough, Wikipedia (of all places) has one of the best definitions of a plot hole I’ve come across:

“A gap or inconsistency in a storyline that goes against the flow of logic established by the story’s plot. Such inconsistencies include such things as illogical or impossible events, and statements or events that contradict earlier events in the storyline.”

So, a plot hole is a contradiction or inconsistency found within your story.

Why Are Plot Holes so Bad?

The problem with plot holes is that they can shatter the reader’s belief in the story you’ve woven. You know that feeling you get when you’re completely lost in a book? During that time, you forget about the outside world and the story’s setting and characters become real to you.

When readers become aware of plot holes, it jerks them from that fictional dream. It ruins the magic of the story and makes them realize the book in front of them is indeed fiction and not real. The plot hole becomes a distraction, and the reader may even begin to look more critically at your novel and try to find more inconsistencies instead of just enjoying the story.

The other problem with plot holes is that they make you look bad as an author. Readers will think you’re sloppy, or that you didn’t bother to think through the logic of your story. Plot holes can be embarrassing mistakes.

Examples of Plot Holes

So how can plot holes appear in your story? Let’s take a look at some examples.

Inconsistency: Let’s say in chapter one you introduce your hero who is a left-handed warrior. But in chapter 8 he’s wielding his sword with his right hand. Or, in book 1 it took your characters 10 days to get from town A to town B. In book 2, it only takes them 3 days. Whoops.

Contradiction: Let’s say you’re writing a fantasy story and early on you established that wizards can only use magic with a wand. But halfway through the story one of your wizards casts a spell with a wave of his hand. This directly contradicts the rules of magic you set earlier in the story.

Illogical: Let’s say your hero has magical fire powers. She has just been kidnapped and is tied up. She manages to find a shard of broken glass nearby and slowly saws through the ropes around her wrists to escape.

But why doesn’t she just use her fire powers to burn through the ropes in the first place? Sawing through the ropes might create tension in that scene, but taking advantage of her powers is the more logical choice for the character in that situation.

Factual Error: Let’s say you’re writing a historical story and your hero arms his fort with cannons to fend off the bad guys. But the problem is your story is set in the 12th century and cannons weren’t invented until the 13th century. Uh-oh.

Impossible: Your hero falls off a 100 foot cliff and survives. Or he becomes a master swordsman in a few days. Or he jumps out of a plane and falls up instead of down. You get the idea. If it defies the laws of science or human capabilities, it’s going to create a pot hole.

How Do Plot Holes Happen?

Now that we know what a plot hole is and have looked at home examples, you might be wondering how they can occur in the first place. Here are a few ways a plot hole can creep into your story:

Losing track of details. A lot of times a plot hole is created simply because the author forgets a detail of the story. This mistake is understandable—there can be an overwhelming amount of details you need to keep track of in a novel, and it becomes even more challenging if you’re writing a series!

Going back to our earlier examples of inconsistency and contradiction, both of these plot holes could have been avoided if the author had been keeping a close eye on the details.

Not setting clear rules and following them. If you’re writing a fantasy story, you need to set rules about how your world works and then follow them. If you don’t set rules, you’re likely to create contradictions and inconsistencies later in the story.

Not thinking things through. Sometimes plot holes happen because the author fails to look at all the angles and think things through. Usually in this sort of situation, the writer is more focused on making things exciting or interesting instead of paying attention to the logical, natural actions the characters would take in the situation.

In our example of an illogical plot hole above, this could have been avoided if the author had put themselves in the character’s shoes and asked what the character would logically do to escape.

Lack of thorough research. Whether you’re writing a medical drama, historical romance, or detective thriller, if you don’t do careful research you’re likely to create plot holes.

Not every reader might catch these mistakes, but some will. If a nurse reads your medical drama and realizes you have no clue about surgical procedures, she will either become frustrated with your book or laugh at you.

Lack of explanation. Sometimes plot holes are created simply because the author neglects to explain something.

Let’s go back to our earlier example of our tied-up hero with the fire powers. The reason she has to use that shard of glass to cut through the ropes is because the bad guys have used some sort of special fire-proof ropes so she can’t use her powers to escape.

But the author neglected to mention this so the reader is left to wonder, why doesn’t she just burn through them?? This leads them to believe there’s a plot hole.

Lack of set-up or foreshadowing. Have you ever read a book or watched a movie where something seemed to come out of nowhere? Two characters are suddenly making out and you didn’t even realize they were attracted to each other. Or the hero is lucky enough to find that gun under his bed when the serial killer is about to murder him.

Situations like these can feel like an inconsistency or contradiction in characters or plot. Where did that gun come from? Why are these two characters in love all of a sudden?

To prevent these sorts of things from feeling like a plot hole, you need to foreshadow or set them up earlier in the story before they happen. Show the characters flirting. Show how the gun got under the bed. Then your reader won’t call into question your consistency or logic.

How do You Find and Fix Plot Holes?

Some plot holes you may discover as you write your first draft, but most you probably won’t notice until you get into editing. The more time you spend with your story the more familiar you will become with it, and the easier it will become to spot plot holes.

Get to know your story inside out. Then, learn to look at it with a critical, careful eye. Think through your scenes and story details and look at them from different angles. Are they logical? Are they consistent? Do they make sense?

I also highly recommended getting another set of eyes on your story. Beta readers will come to your novel with a different perspective and will be able to spot plot holes you may have missed.

If you do come across a plot hole, try asking the following questions to begin brainstorming a solution to fix it:

  • How much of the story did this detail effect? How much will I need to change? (i.e. the ripple effect)
  • Can I simply remove this detail completely?
  • Can I change this detail or replace it with something else that makes sense?
  • Do I need to add, remove, or change something else in the story for this detail to work?
  • Do I need to provide more explanation? Can I explain away this detail to make it work?
  • What would my characters naturally do in this situation?
  • Do I need to set up or foreshadow this detail earlier in the story?

Keeping Track of Your Story’s Details

Another way to find and fix your story’s plot holes, or avoid creating them all together, is to keep track of your story’s details.

Years ago, I spent some time volunteering as a script supervisor for a local film company. What is a script supervisor, you ask? Well, the script supervisor’s job is to make sure there are no continuity errors in a film.

Every day I would closely observe the scenes as they were filmed with my continuity log in hand, taking careful notes.

So, for example, at the beginning of a scene I might take notes on where all the props were before the actors touched them. If we had to do another take or switch camera angles, my notes would be needed to return the props to their original positions. Sometimes, photos would be taken in addition to the notes.

This would prevent inconsistencies between camera cuts in the final version of the film. So let’s say two characters are talking and there’s a gun on the table. The camera cuts to character #1, who is now holding the gun. Then the camera cuts to character #2. Then the camera cuts back to character #1 who reaches for the gun.

Um, wait a minute, wasn’t he just holding the gun a second ago? Yep, he was. The script supervisor’s job is to prevent continuity errors like these through the meticulous notation of details.

To avoid inconsistencies and plot holes, you must become the “script supervisor” for your novel and be obsessive about details.

To help you out, I’ve created a free worksheet for you inspired by a script supervisor’s continuity log. You can use this worksheet to go through your novel scene by scene during the writing and/or editing phase and note all of your story’s details to make sure they stay consistent and logical.

Grab it here:

Plot hole continuity log

Let’s Review

  • A plot hole is a contradiction or inconsistency found within your story.
  • They ruin the experience of getting lost in a story for the reader and can make you look sloppy or lazy as a writer.
  • They can take different forms: inconsistencies, logical fallacies, contradictions, factual errors, and impossible events.
  • They can occur in a number of ways: losing track of details, failing to establish rules, failing to think things through, lack of research, lack of explanation, and lack of set up or foreshadowing.
  • Getting to know your story inside out and learning to look at it critically will help you uncover plot holes. Beta readers can also spot errors you may have missed.

The Simple Secret to Figuring Out How Much Development Your Minor Characters Need

Who are the main and minor characters in your novel? Can you tell the difference? Where do you draw the line between the two? How do you decide how fleshed out each one needs to be? Use this simple trick and never scratch your head over how much to develop minor characters again!

At the moment, I have seven minor characters who have recurring roles in my current novel-in-progress.

Yes, you read that right—seven.

Yes, I’m a little crazy.

And yes, it took an endless supply of tea for me to get through this story without losing my mind. (Actually, that last part is still debatable, but I digress…)

It’s a large cast, the largest I’ve ever taken on, and it was overwhelming trying to develop and keep track of so many characters. One of the most confusing parts of having a cast that large, I quickly realized, was trying to figure out how much to develop each character.

Who was a minor character? Who was a main character? Where did I draw the line between the two? How did I decide how fleshed out each one needed to be? Did they all need character arcs? Did I have to tell the backstory of each one?

As if my head wasn’t spinning enough already.

Three drafts later I got it figured out eventually, but I want to save you that time and trouble and hopefully some extra work. Once I figured out the determining factor I could use to easily decide how much I need to develop each of my characters, I was doing a major face palm.

It’s pretty simple and obvious, and I’m going to share it with you in a bit. But before we get there, we need to go over how to tell your main and minor characters apart.

Main vs. Minor Character—What’s the Difference?

Main characters are well-developed, have an important role in the story, drive the plot, and spend a lot of time on the page.

On the other hand, minor characters are flat, don’t play major roles in the story, add to the plot but don’t shape it, and have less page time.

Main characters are the are the meat of the story; minor characters are the spices.

How Much Should You Develop Minor Characters?

By definition, minor characters don’t need to be well-developed. Yet I often hear writers say they’re worried their minor characters are too flat and they want to know how they can give them more dimension.

This thinking comes from the misconception that flat characters always = bad, and round (well-developed) characters always = good. Therefore, if you make all the characters in your novel round, it will be even better!

Hold your horses there.

This is one of the biggest MISUNDERSTANDINGS of minor characters. Your minor characters don’t need to be round. You’re creating unnecessary work and headaches for yourself trying to fix a problem that isn’t actually a problem.

You need BOTH round and flat characters in your novel. Why? Every character has a role to play in the story, just like actors in a play. Some roles are big (aka leading roles). Some roles are small with only a few lines. And some roles may not even have a speaking part at all!

The thing is, when you start to add more dimension and development to a minor character, you’re spending too much time on a character who doesn’t have a huge role in the story. The more time you spend on something in a novel, the more important your reader will assume it is.

So if you spend all this time fleshing out a character who doesn’t have an important role in your story, you will confuse your reader by misleading them to think the character was more important than they actually turned out to be.

The other problem is that every character simply can’t be round. There’s not enough page space to give every character that sort of development, not to mention it would create a mess. It would be like watching a play where every actor with a minor role was trying to hog the stage by adding extra lines and scenes for their character.

A good rule of thumb is that the bigger role a character has and the more important she is to the story, the more development she needs. The smaller the role, the less development.

We’ll explore this more in-depth in an example here in a moment.

Types of Characters

Some characters have larger roles than others, which creates a spectrum of varying degrees of importance and development. These can blur and blend together, but here are the main types you will often see:

Extras—minor characters who serve as the background or scenery of the story and help make the setting feel full and alive. They may have a brief role for one scene, but once they’ve fulfilled their purpose they disappear. Sometimes, they may not have a speaking role at all. (Ex. a waiter, taxi driver, bartender, etc.)

Recurring Characters—minor characters who may become momentarily involved in the action and have small roles to play. Unlike Extras, they appear multiple times throughout the story and we learn a little more about them. (Ex. the hero’s mother, teacher, coworker, etc.)

Main Supporting Characters—main characters who help the hero along their journey towards achieving their goal. They appear constantly throughout the story, and of all the minor characters they get the most page time and development. (Ex. the hero’s best friend, sidekick, love interest, etc.)

Hero—the main character at the top of the hierarchy, the most important and the one driving the plot. Without this character there would be no story.

Case Study: Harry Potter and the Sorcerer’s Stone

Let’s look at an example of these types more in-depth using Harry Potter and the Sorcerer’s Stone.

Do you remember Griphook, the goblin who takes Harry and Hagrid down into the vaults below Gringotts bank? It’s his only scene in the book, and we don’t learn anything about him other than he works at Gringotts. His role in the story is to serve a function in the scene—to take Harry and Hagrid down to the mysterious vault 713 and retrieve what we later learn is the sorcerer’s stone.

We don’t care that we don’t learn more about Griphook, and we don’t need to—he’s not important to the story. J.K. Rowling knows this, so she doesn’t spend much time on him. He’s a flat character but it doesn’t matter because he serves his purpose.

Griphook is an example of the “Extra” minor character—he’s part of the scenery and helps make the story world feel full and realistic, along with the other goblins in Gringotts who were mentioned but weren’t named or given any dialogue. Once his role is finished, we move on and leave him behind.

In comparison, Hagrid is a Recurring minor character. He doesn’t drive the story, but he becomes a friend and guide to Harry and becomes involved in the action from time to time. For example, “rescuing” Harry from the Dursleys and whisking him away to Hogwarts.

He has recurring appearances unlike Griphook and because of his relationship to Harry and his occasional participation is the action, we see more of him and get to know him a little better.

We learn he has a wand hidden in an umbrella and he’s not supposed to do magic, he’s a gamekeeper at Hogwarts and lives in a hut on the grounds, he has a dog named Fang, and he has an affinity for ferocious magical creatures.

Next, we have Ron and Hermione, who are Main Supporting characters. Unlike Griphook and Hagrid, they get even more page time and development because they play a more important role in the story—helping the hero achieve his goal.

Companions, sidekicks, and sometimes even love interests who are constantly by the hero’s side are all supporting characters. Supporting characters need to be more rounded because we spend more time with them and they’re more important.

Finally, at the top of this character hierarchy we have Harry, who is of course the hero of the story. He is the character we spend the most time with, learn the most about, and who is the most developed.

Increased Importance = Increased Development

Hopefully you can see from this example how the development increases with each character as their importance to the story increases:

Griphook>Hagrid>Ron & Hermione>Harry

Extras and Recurring minor character like Hagrid and Griphook can be flat without any problem—they’re the spice that adds color and interesting flavor to the story. On the other hand, Supporting main characters like Ron and Hermione who are of greater importance will need to be more developed and be more round. Finally, your hero like Harry will need to be fully fleshed out.

The one caveat to all of this is that sometimes over a series of books a minor character can become more rounded and may even increase in importance and expand their role.

For example, towards the end of the Harry Potter series when we learn more about Snape’s past it gives the character more depth. But at the beginning of the series he just starts out as Harry’s nasty potions teacher. However, a standalone novel won’t have to page space for this sort of development of minor characters.

So to sum things up, the secret to figuring out how much development your character needs lies in their importance to the story. When you realize the size and scope of the role your character will play in the overall plot, you will be able to decide how much page time and development you should give them.

Let’s Review

  • Main characters are the are the meat of the story; minor characters are the spices.
  • Flat characters aren’t necessarily bad. You need both flat and round characters in your novel.
  • The bigger role a character has and the more important she is to the story, the more development she needs. The smaller the role, the less development.
  • Extras, recurring characters, main supporting characters, and the hero all have varying degrees of importance.
  • Supporting characters like companions and sidekicks need to be more developed than minor characters.
  • The hero should be the most rounded and fleshed out character in the story since she’s the one the story is about and who we will spend the most time with.
  • The secret to figuring out how much development your character needs lies in their importance to the story.

The Ultimate Guide to Mastering Character Descriptions

Writing vivid character descriptions is a struggle many writers face. If you're tired of your descriptions falling flat this guide will help you become a pro once and for all! Plus, there are free worksheets and cheat sheets to help you write character descriptions the easy way!The first time I tried to describe my characters, it was a total disaster.

I couldn’t understand why because I’m a very descriptive writer. Describing landscapes? I got that. Fantasy creatures no one’s ever seen before? You betcha. Medieval cities? I’m a pro.

But when it came to people, suddenly I couldn’t find any words that worked. No matter what words I used, the descriptions fell flat instead of bringing my characters vividly to life.

I didn’t realize then that I was going about my character descriptions all wrong—I thought I just sucked at describing people. Years later, though, I learned that anyone can write a stellar character description, even if descriptive writing isn’t their strong suit!

Any of this sounding familiar? Describing characters is something a lot of writers struggle with, myself included. Though I’ve come a long way since my first feeble (and horrible) attempts, it’s still something I have to work harder at than other types of description.

I don’t know if I’ll ever understand why people seem to be so tricky to describe, but I don’t want you to face the same frustrations and struggles that I did. You’re not alone, and I’m here to help, friend!

I’ve written this MONSTER guide to answer all of the most frequently asked questions about describing characters I’ve gotten from writers like you. I’ve also created FREE worksheets and cheat sheets to make describing your characters a whole lot easier, so be sure to grab those below! (No email sign-up required!)

Now, without further ado, let’s get into the why, when, who, what, and how of character description!

What Is the Purpose of Character Description?

I feel like the purpose of character description often gets somewhat muddled in writers’ minds. If I asked you why you want to describe your character in your story, what would your answer be? You would probably say you want to give the reader a clear mental picture of what your character looks like.

That’s a valid reason, but there’s another that is even more important but sometimes gets overlooked.

The main way I use character description in my stories is as a form of characterization. Through descriptive details, I try to reveal the character’s personality so that not only does the reader come away with a mental picture of what the character looks like, but they also get a feel for who the character is.

Before I viewed description as an opportunity to characterize, I was hung up on the description itself. I thought character descriptions had to be beautiful and lush with detail. I felt a lot of pressure to find the right words so my readers would picture my character exactly as I did. I thought because I couldn’t write gorgeous character descriptions, I sucked at them.

But you know what I finally realized? Describing a character is more about characterization than flowery language. Once I realized this, a lot of the pressure I felt toward describing my characters lifted.

When Should I Describe My Character?

Whenever you introduce a new character, you should try to describe her as soon as possible. Why? Because the moment a character steps onto the page, the reader’s imagination will immediately begin to conjure an image.

For example, let’s say I encounter a character named Louise in a story. I immediately begin to picture a brunette woman in a retro dress, bright red lipstick, and fashionable glasses. Don’t ask me why, that’s just the image that springs to mind.

Now, this image may or may not match up to the author’s own personal idea of what she intends Louise to look like. If the author doesn’t give me any details to provide me with a different mental picture ASAP, I’m going to stick with my own version.

If you wait too long to describe your character, the reader will likely reject your description in favor of their own mental image. Let’s say you’re reading a story and you’ve been imagining the heroine as a petite girl with a blonde pixie cut, but halfway through the book you find out she’s actually 6 foot tall with waist-length black hair.

That discovery will be jarring to the reader. Since the read is already familiar with the mental image she had created for the character, she will likely ignore this description and keep imagining her the way she likes. I have done this several times myself as a reader!

To avoid this situation, try to describe a new character as soon as she’s introduced to provide the reader with the mental image you want them to have.

Now, there is one exception to this. If a character is introduced in the middle of an action scene, you do NOT want to bring the action to a screeching halt to describe them. Wait until things have calmed down, and then you can describe them. It’s okay to wait a few pages, I promise.

Which Characters Should I Describe?

You don’t have to give a detailed description of every character in your novel. You should give most of the attention to your main characters, and then add a little detail to your secondary characters.

You don’t need to describe the desk clerk at the hotel, the taxi driver, or the bartender. Some characters are just background extras that don’t have any importance in the story so you don’t want to spend any more time on them than necessary.

If you start describing these types of characters you call attention to them, and you could confuse the reader into thinking they might be important later when really they have no significance other than filler to make your story world feel fleshed out. So let the reader’s imagination fill in the blanks on this one, or limit yourself to a brief, simple description like “the burly bartender.”

I also want to point out that there tends to be a difference between how main characters and secondary characters are described. Secondary characters are often more colorful, exaggerated, and quirky. Because they have a small role, they have to burn bright to be memorable. So feel free to get crazy with your secondary characters and have some fun!

How Much Should I Describe?

The amount of character description really depends on the writer and their writing style. Some writers are really good at writing beautiful character descriptions, so they might make their descriptions longer. Other writers have a very to-the-point and less descriptive writing style, so their character descriptions may be very sparse.

I would say a paragraph of character description should be more than enough (with 3-5 sentences being one paragraph). Any more than that might start leaning toward too much, but it’s always a judgment call. A reader can only remember so many details and you don’t want to overwhelm them. Often, less is more.

Funnily enough, I don’t think there’s any danger in describing too little. In fact, some writers intentionally choose not to describe their characters at all. Now, you’re probably thinking, why in the world would any writer want to do this? Good question.

One argument for not describing your characters is to allow the reader full control over how they want to imagine them.

Remember how earlier we talked about readers immediately conjuring mental images for characters? Readers’ imaginations are powerful and very good at filling in the blanks. Some readers prefer to imagine things their own way and not be told how to image them by the author.

Another argument for this tactic is that when a character is left undescribed, the reader will often project their own physical features onto the character.

So if they’re blonde, they’ll likely image the character as blonde. If they’re Asian, they’ll likely imagine the character as Asian. This is why some authors prefer not to describe their heroes—so that the reader can imagine the hero looks like herself, no matter her physical features or race.

It’s a beautiful thought that one character could look so many different ways to so many different readers!

So really, it comes down to personal choice. When you have a specific image in your head of what your character looks like, it can be hard to relinquish control and let the reader imagine them however they want. However, if you want the reader to picture the character a certain way, then by all means provide them with that description!

But keep in mind that no matter how meticulously detailed your description is, your readers won’t recreate your mental image with 100% accuracy (and that’s okay!).

Words aren’t photographs, and that can sometimes be challenging and frustrating. This is why the best advice I can give you is to focus on characterizing with description instead of focusing on writing the most accurate description possible.

What Should I Describe?

Many writers have trouble moving beyond hair and eye color in their descriptions, and I get it. Those two things are the easiest and most obvious to describe. But what else can you say about a character’s physical appearance?

To create an effective character description, it’s all about 1) choosing the right details to convey personality, and 2) choosing the most interesting details. Remember, you don’t need to describe everything. You just need to describe the best things.

For example, depending on which details you choose to focus on, you could convey a wild character (spiked lime-green Mohawk, mermaid tattoo, wearing a live yellow boa constrictor as a scarf), a sloppy character (uncombed hair, wrinkled shirt, crumbs in beard), or a timid character (hunched posture, eyes cast downward, plain/muted clothing).

Notice how I only mentioned a few details but already you probably have a pretty good visual picture of these characters and a feel for who they are. It doesn’t take much! And these types of details tell the reader far more about the character than “he had jet black hair and blue eyes.” Ask yourself what this character is like, and how you can express this visually.

Here are some ideas of what you can describe to get you started:

  • Facial features (face shape, eyes, nose, lips, jaw, chin, brows, ears, cheekbones, facial hair)
  • Hair color, texture, and style
  • Build/body type and height
  • Skin tone
  • Skin texture (weathered, wrinkled, smooth, hairy, etc.)
  • Skin afflictions (acne, eczema, oily, moles, warts, boils, etc.)
  • Distinguishing features (scars, freckles, birthmarks, tattoos, piercings, etc.)
  • Teeth
  • Makeup
  • Clothing, accessories, and personal items
  • Voice/accent
  • Posture
  • Scent
  • Gestures, body language, mannerisms

How Do I Describe My Characters? (Tricks for Better Descriptions)

1. Avoid Creating a Grocery List of Physical Traits

Don’t merely list out your character’s physical traits like you’re checking items you need off a list. It will end up sounding like this:

“He was a young man with brown eyes and black hair. He was tall and wore jeans with a red t-shirt.”

Blah! The problem with this sort of description is that it’s completely forgettable and boring. It doesn’t create a vivid image that brings the character to life. It doesn’t reveal anything unique or interesting about him. This description is far too basic; we need to go deeper to create a character that pops off the page. Read on to find out how!

2. Choose Interesting Details

As I already mentioned earlier, you want to choose interesting details about your character that show his personality. Don’t go overboard here—two or three should be plenty. One carefully chosen detail can say far more about your character’s personality than five or ten general details.

3. Use Similes and Metaphors

Using similes and metaphors help to give a more vivid picture and a stronger emotional impression about a character.

For example, instead of “He was tall” a better description would be: “His towering bulk loomed in front of her like a mountain, immovable and impassable.”

The first is just a stated fact. However, the second gives us the feeling that this character is formidable and might pose a problem or obstacle, and the imagery is much stronger.

4. Consider Perception

The description of a character can change depending on who is describing him. For example, a man’s wife will describe him far differently than his enemy.

Consider how your viewpoint character perceives the character being described, and communicate their impression through word choice and the details they focus on.

5. Get Specific

The more specific you can get with your details, the more vivid and interesting your description will be and the more it will reveal about the character.

For example, instead of “He had blue eyes” try, “His eyes were the same turbulent, depthless blue as the sea he had sailed upon since he was a boy.”

The first tells us nothing, while the second suggests the character is dealing with some sort of internal turmoil and also reveals he’s a sailor.

6. Add Movement

People aren’t still-life portraits. When you put your characters into action, it helps bring the description to life.

What is your character doing? Clutching nervously at her purse on a busy street? Tapping her foot as she waits in line for coffee? Hunching her shoulders and ducking her head as she walks through the school halls? Hot wiring a car? Dancing in the middle of the supermarket?

Actions help to reveal the character’s emotions, hint at what’s going on beneath the surface, and characterize her further.  Try to incorporate body language, posture, mannerisms, and other actions into your descriptions.

Let’s Review

Now that you know the why, when, who, what, and how of describing your characters, it’s time to practice writing some descriptions of your own. It’s okay if your descriptions don’t turn out perfect at first—I promise the more you practice, the better you will become!

To help make things easier, I’ve created a collection of FREE worksheets for you to use. You’ll find cheat sheets that list physical details for easy reference and ideas, in-depth description worksheets to help you uncover the most interesting details about your character, and my 5 step no-fail character description template.

Click below to download + print these resources and get started! (No email required! It’s 100% free. Seriously.)

Key Takeaways:

  • Describing a character is more about characterization than flowery language.
  • When you introduce a new character, describe her as soon as possible before the reader creates and grows accustomed to their own image.
  • You don’t have to give a detailed description of every character in your novel, just the important ones.
  • Secondary characters often have more colorful, quirky descriptions to make them more memorable due to their smaller roles in the story.
  • How much you describe is up to you. Some writers choose not to describe their characters at all so the readers can create their own images.
  • You don’t need to describe everything about your character, you just need to describe the best things.
  • Choose details the most interesting details that convey your character’s personality.
  • Ask yourself “What is this character like?” and then express this visually

Additional Resources:

signature

My 4-Step System for Hacking Your Creativity

Seasoned writers know that you can't wait for inspiration to write, as inspiration tends to be fleeting and fickle. But with the simple process, you can engage your creative mode whenever you need it!

If there’s one truth all writer’s know, it’s that inspiration is a fleeting, fickle creature. It comes and goes of its own will, teasing and baffling us with its unpredictable nature. Though we try to tame it, inspiration continues to thwart us and slip through our fingers.

But what if I said you could learn how to tap into your creativity and summon ideas whenever you like? You see, your creativity is always present in your mind, hiding just beneath the surface. With a little practice and strategy, you can learn how to lure it out when needed.

For the longest time, I failed to understand why my mind would hum with a sudden buzz of creativity at seemingly random times, like during a shower or while lying in bed trying to fall asleep. Yet at other times, like when faced with a blank page, my mind would be completely silent. Sound familiar? That’s because there’s a reason behind why your mind’s creative mode is engaged during certain times.

If you’ve ever felt frustrated that your bursts of inspiration are too few and far between, you’re in good company, friend. Let’s break down how to engage your brain’s creative mode step-by-step, and unravel the whys behind the mystery.

Step 1: Find a Quiet Place Free of Distractions

In his book Slowing Down to the Speed of Life, psychotherapist Richard Carlson explains:

Creativity bubbles up inside you automatically when your mind is clear and quiet. Those moments when your mind is free of distraction are the very moments you have the greatest potential for creativity.

When your mind is filled with a constant swarm of activity, it suffocates your creative thinking. However, when your mind is allowed to relax, your creativity has room to breathe.

This is why so many writers (myself included!) say they get their best ideas in the shower, while lying in bed, or while driving. These are some of the few “quiet” moments we have alone with our thoughts in our hectic lives.

This means that if we want to tap into our creativity, we first need the right environment. Whether it’s in your home, a park, a coffee shop, or a library, find a quiet place where you won’t be disturbed or distracted. You may need to further eliminate some distractions by turning off your phone or temporarily disconnecting your internet.

Personally, I’ve found that my best places to do my creative thinking are in my bedroom, anywhere out in nature (usually during a walk), in the car, and during a hot bath or shower. These are places where I’m the least distracted, and during these times I switch my phone to silent so my thoughts won’t be interrupted if I receive a call or text.

I also want to point out here that ‘quiet’ doesn’t have to mean complete silence. Your environment just needs to be quiet enough so that your thoughts aren’t drowned out by external noise. Some people might think better with background noise, like music or the sounds of a coffee shop, but I’ve found these usually compete too much with my thoughts.

Choose whatever sort of ‘quiet’ works best for you.

Step 2: Unclog Your Mind and Focus on the Present

Whenever we set out to create something, we always begin with something empty. A blank canvas, an empty page, a fresh roll of film. Similarly, before your mind can begin creating and filling itself with ideas, you first need to empty it.

This means letting go of all thoughts of anything related to the past or future and focusing only on the present moment.

Our brains have two main modes of thinking: analytical thinking and creative thinking. Analytical thinking involves any sort of analyzing, problem-solving, calculation, dwelling on the past, and worrying about the future. When we turn off our analytical thinking and focus on the present, we can then switch into creative mode.

Every day our minds get clogged with hundred of thoughts—the fight we had with our significant other this morning, how we embarrassed ourselves at work last week, the friend who’s been annoying us all afternoon, our anxiety about that upcoming deadline, our worries about how we’re going to pay off our student loans after we graduate.

It’s no wonder we struggle to find our creativity when our heads are so full! When we continue to turn these thoughts over and over in our heads, we’re engaging in analytical thinking.

In order to tap into creative mode, your mind can’t be engaged in the past or the future. Those thoughts buzz in our minds, creating too much noise and distraction. To awaken our creativity, we must quiet our minds by focusing on the present moment and nothing more.

I’ll admit that at first I found it challenging to empty my mind and focus on the present. How does one even go about doing that? What does that look like? I quickly learned three easy strategies to achieve this: 1) focus on my breath, 2) focus on physical sensations, and 3) focus on sounds around me.

1. Breath—Try practicing deep breathing. Breathe in long and slow, hold for a few seconds, and then release long and slow. Focus on the feel of your lungs contracting and expanding, and imagine yourself drawing and releasing your breath from and throughout your entire body, from your head to the tips of your toes.

2. Physical Sensations—Focus on your body and physical environment. Are you snuggled under a cozy blanket? Is the sun warming your skin? Is your cat or dog curled up beside you?

3. Sounds—Focus on the sounds in your environment. Is there wind moving through the trees? Raindrops pattering against the roof? You could even try playing some nature sounds or music.

Basically, focus on anything that will ground you in the present moment. Once you start tuning your thoughts into the present, your mind will start to empty and quiet in preparation for creative thinking.

Step 3: Invite Creativity With Questions and Curiosity

Once you have a quiet mind, you have a blank canvas to begin your creative work. Allow your thoughts to begin to wander, daydream, and become curious. To help guide your thinking and invite your creativity to come out to play, try asking ‘what if.’

For example, what if aliens invaded earth? What if a thief fell in love with a prince? What if dragons existed and were alive today?

Once you’ve found an interesting ‘what if,’ explore it further by asking questions such as ‘what next’ or ‘why.’

Why did the aliens invade earth? What happens after the thief falls in love with the prince? You might also try asking ‘who could be involved in this story?’ In the case of the dragons in the above example, is there someone who hunts them, tames them, or rides them?

Or, if you already have a story in progress, you could think of scenes for your plot, get into your characters’ heads, or delve deeper into your story’s world if you’re writing Fantasy.

Don’t get frustrated if you can’t think of anything interesting. Just relax, have fun, and keep exploring your thoughts. Not every idea has to be material for the next best seller, but the more ideas you can come up with, the better chance you will have of finding one that’s worthwhile.

Step 4: Capture Your Thoughts on Paper

While you’re daydreaming, write everything that comes to mind down on paper. This helps to keep your mind clear so your thoughts don’t have to linger on the same ideas for fear of forgetting them. Your creativity will continue to flow, and you can continue to explore and produce new ideas without worrying about clinging to others.

If you hit any sort of snag or something you don’t know the answer to yet, just write it down and keep going. You don’t need to know everything right now—you can hammer out the details later. If you stop to analyze an idea too closely and try to problem-solve, you will switch off your creative mode and turn on your analytical mode. You will stop the flow.

You’re Now a Creativity Mind-Hacking Jedi!

Now that you know the secret behind how to hack into your creative mode, you can use this Jedi mind trick anytime you like! This process might seem ridiculously simple, but I promise you it works! The next time you’re staring at a blank page getting nowhere and feeling frustrated by your lack of inspiration, step back and use these steps to engage your creative mode.

To summarize, here are the steps again:

  1. Find a Quiet Place Free of Distractions. A quiet mind gives creativity room to breathe.
  2. Unclog Your Mind and Focus on the Present. Analytical thinking smothers creativity, so don’t dwell on the past or future. Instead, ground yourself in the present moment to empty your mind.
  3. Invite Creativity With Questions and Curiosity. Ask what if, what next, why, and who to explore ideas for potential or current stories.
  4. Capture Your Thoughts on Paper. Keep your creativity flowing by avoiding the fear and distraction of forgetting ideas. If you get stuck, keep going–don’t stop to problem-solve the idea or you will activate your analytical mode.

Do you have any special tips or tricks for hacking your creativity? Share them in the comments below!

signature

Now Available: THESE SAVAGE BONES (Plus, I Get Vulnerable About What It’s Like Being a Published Author)

savagebonesfinalOver the last several weeks, I’ve been sharing with you what I’ve learned about self-publishing as I navigate the process myself for the first time. We’ve talked about how to write book blurb, how to find a cover designer, how royalties and advances work in traditional publishing, and the costs and royalty rates of self-publishing.

I’ve learned so much throughout this process and have gained a newfound respect for indie authors. And today I’m so excited to announce that after months of hard work, my YA novella, THESE SAVAGE BONES is now published on Amazon and available for Kindle!

You can click here to purchase your copy, or, if you’d like to read the first chapter for free, click here.

Here’s a description of the story:

Mexico, 18These Savage Bones: a novella by Kaitlin Hillerich75. Twenty-three-year old Esperanza de la Rosa knows more about steam engines and electromagnetics than a proper lady should. Fiercely independent, she’s more interested in science and superstition than finding a suitable husband.

When Esperanza’s uncle is murdered during the Day of the Dead, her world is shaken. To catch the killer, she must accept the help of the last person she wants to see—her ex-fiancé Alejandro Valladares, a gentleman turned bounty hunter with a troubled past.

Thrust into a tangled web of secrets and lies that threaten to destroy everything she thought she knew, Esperanza must uncover the truth and bring her uncle’s murderer to justice or her failure will haunt her forever.

So how does it feel to officially be a published author? Honestly, very surreal. It hasn’t completely sunk in yet, and I’m still getting used to thinking of myself as an author.

In my mind I’ve always been a writer, but I’ve never thought of myself as an author. For me, I’ve always thought of an author as someone who has had their work published. Now that I have a book people can purchase and read I suppose that puts me in that category, but it still feels strange.

It’s also very exciting. I’ve been writing for 11 years now and have written a handful of novels that never saw the light of day, and it’s such a thrilling experience to finally be able to put a story in the hands of readers. I feel so honored and humbled that people actually want to spend their time and money on my book, and it’s extremely fulfilling as a writer. Knowing that I now have readers means the world to me.

All that being said, I’m now going to be honest and vulnerable with you. Publishing is also scary and nerve-wracking. I can’t tell you how many times I asked myself throughout the process, “Are you really going through with this?” At times my doubt would kick in and I would wonder if I was making a huge mistake. What if the story sucked? What if people hated it?

It took me a while to work up the nerve to hit that “publish” button on Amazon, and after I did I felt a little ill. Publication has been one of my deepest, darkest fears as a writer, but I knew that if I wanted to start building a career as an author, it’s a fear I would have to overcome.

It’s hard putting your story out there–it’s a part of yourself, and you’re exposing yourself to criticism and rejection. It takes a lot of courage to become vulnerable and share your work with the world. Though I haven’t received any yet, I know negative reviews are inevitable because it’s impossible to write a book everyone loves.

But I’m trying to remember that I didn’t write this book for those readers–I wrote it for the readers who will fall in love with the story and characters. I’ve come to realize that at the end of the day, you can’t be afraid to publish your story because of the people who will hate it. You need to publish your story because there are people out there who will love it, and they’re the ones you wrote it for.

So I guess what I’m trying to say is, don’t let your future haters rob your future readers of the joy of reading your story.

Writing THESE SAVAGE BONES has been such an amazing experience. When I first decided to write and self-publish a novella three months ago, I wasn’t sure what I was getting myself into. It’s been a challenging journey and I’ve been forced to step way outside my comfort zone, but I’m so glad I decided to do this. When we stretch ourselves until we’re uncomfortable it’s how we grow as writers, and I feel like I’ve grown so much through this process.

If you’re thinking of self-publishing your book–or even submitting your book to a traditional publisher–I hope you will have the courage to put your story out there for the world to see. As writers, we have to learn how to be brave, and the only way to do that is through practice. At some point, we have to take the plunge. I know it’s terrifying and uncomfortable and downright hard, but if you’re always afraid of falling you’ll never give yourself the opportunity to fly. If I can overcome my fears I know you can to, and I want you to know that I believe in you, friend. Mmk?

I’m looking forward to seeing how THESE SAVAGE BONES does in the upcoming weeks, and if you’d like to purchase your own copy, click here. (Or, if you’d like to read the free sample chapter first you can do so here). I greatly appreciate your support, and I’m honored to have you as a reader.

signature

The Writer’s Guide to Self-Publishing Costs and Royalties

Thinking about self-publishing your book? Learn the costs involved and what sort of royalties you can except!Last week, I broke down what authors can expect from advances and royalty rates of traditional publishers. Today, as promised, we’re going to take a look at the self-publishing side of things.

I’ve been exploring the world of self-publishing for the first time as I intend to self-publish my upcoming novella, THESE SAVAGE BONES. I’m learning as I go, and I want to share what I’ve learned with you to help make your publishing journey a little smoother. So today, let’s delve into the costs of self-publishing and what sort of profits you can expect.

Self-Publishing Costs

When you publish your book with a traditional publishing house, you’re not expected to pay any of the costs involved in creating the book. But when you self-publish you become the publisher, so all of these costs are left up to you. What kind of costs are we talking here?

Now, how much you spend on all of these can vary widely. Indie authors have published books on budgets of a couple hundred dollars to a couple thousand.

While you don’t have to spend thousands, you do want to make sure you’re putting out a high-quality product. You want your book to look professional inside and out to build trust and credibility with your readers.

So how about much should you expect to spend? Keeping in mind these numbers vary widely, here’s a very rough average: Cover Design ($100) + Editing ($1,200 for a 80k word story) + Formatting ($60)= at least $1,360, plus marketing.

How much should you spend on marketing? Again, that’s another number that varies widely. Maybe you don’t want to spend any money on marketing. Maybe you just want to spend $20 on Facebook ads. Or maybe you want to buy a Kindle for a giveaway. You can do whatever fits your budget.

I know it can be scary spending money on something that isn’t making you money yet. A lot of indie publishers say to view these costs as an investment rather than an expense since once your book is published it will continue to earn you money from royalties without any additional work on your part (except maybe some marketing).

While this is a good mindset, I’m going to be honest with you–just like with a traditional publishing house, when you publish your book you run the risk of it flopping. It might not earn back the money you put into it, or you might just break even. There’s really no way to know until you try.

With any sort of business there is some amount of risk, and as a self-publisher you are now a small business owner. And as any business owner knows, you must spend money to make money. I don’t want you to be afraid to take the risk to pursue your publishing dreams, but I do recommend you be smart about it. Spend what you can afford, and stay within your budget.

Self-Publishing Royalties

As we get into royalties in the self-publishing world, I’m going to specifically be looking at Amazon since it’s the most popular and has some of the highest royalty rates. However, there are are other platforms where you can sell your book such as Kobo, Google Play, Nook, and iBooks.

You might decide to just stick with Amazon, or you could sell your book on multiple platforms to create multiple streams of income. I’d recommend testing out different platforms to see what works for you and where your book might sell well–you never know!

When you self-publish through Amazon your have two options:

1) Kindle Direct Publishing (KDP)–This allows you to publish your e-book on Amazon for Kindle.

2) Create SpaceOwned by Amazon, this allows you to publish print books. Amazon prints the books as they’re purchased and delivers them for you, and you don’t have to pay anything up front. The cost of printing the book is taken out of the profit. Your book will only be sold on Amazon, though you can pay a fee to sell it through other retailers such as Barnes and Noble.

So what are some of the main differences between traditional publishers and Amazon in terms of royalties? Unlike traditional publishers who only send out royalty checks twice a year, Amazon pays out royalty checks monthly as long as you hit the $100 minimum. Amazon authors also receive larger royalty rates, and as a self-publisher you don’t have to pay an agent their 15% of your profits for their services.

The other major difference is that in self-publishing, you don’t receive an advance. That means your book doesn’t have to pay back its advance before you start receiving royalties–you begin receiving royalties right away. (For a more in-depth explanation of advances, click here).

E-book Royalties

So what do Amazon’s royalty rates look like? First, let’s take a look at the e-books:

  • E-books priced between $0.99-$1.99= 35% royalty rate
  • E-books priced between $2.99-$9.99= 70% royalty rate
  • E-books priced above $9.99= 35% royalty rate

Compared to the traditional publishing average of a 25% royalty rate for authors, these numbers look pretty good. Also, remember that as a self-publisher you also won’t have to give an agent her 15% cut of your earnings. Even better.

If you’re wondering about how much to charge for your e-book, let me take a moment to beseech you to please price it at least at $2.99. Your book is worth at least as much as a cup of coffee, and after all the work you put into it you deserve that 70% royalty. You might do a temporary sale or promotion for less, but please don’t undervalue your work. Mmk?

Print Book Royalties

So what about print books? First of all, Create Space only prints paperbacks, not hardcovers (thought I should point that out). Royalties also get a little trickier here, as Amazon calculates your royalties based off the cost it will take them to print the book, which seems fair enough to me. You can use their royalty calculator here to get a rough estimate. Let’s do a little math, shall we?

Let’s say you’re printing a 300 page novel with a standard 5.5″ x 8.5″ trim. Let’s say you set your list price at $12.99. After you add up Amazon’s costs & cut (the numbers listed in the right-hand column if you’re using their calculator), which total $10.02, you’re left with a profit of $2.97. That comes out roughly to a 23% royalty rate.

Now, that might not seem like much, but do you remember the royalty rate of a traditionally published paperback? It was: 8% for the first 150,000 copies sold, then 10% after. (Plus, remember, you have to pay your agent 15% of your profits.)

That means for that same paperback book you’d receive an 8% royalty of $1.04 per sale, minus your agent’s 15%.

Looks a lot better now, doesn’t it?

The Down Side…

But how many books can you expect to sell? Remember that in the U.S. on average, a (traditionally published) book sells around 250 copies per year and 3,000 in its lifetime. But for self-published books, the average is 250 copies sold in its lifetime. Ouch.

That means your $12.99 paperback with its profit of $2.97 per copy would make you a grand total of $742.50. And do you remember that $1,360 cost of creating the book we averaged out earlier? Yep, you didn’t actually make a profit. Double ouch.

The advantage to a traditional publisher is that you don’t have to fear losing money because the publisher is investing in the book, not you. And, a traditional publisher will pay you an advance (anywhere between $5k-$15k), which you won’t have to pay back even if the book loses the publisher money. So in traditional publishing, there’s no financial risk for the author.

Don’t Give Up

I know these numbers can seem disheartening, but you have to remember that they’re just that–numbers. Averages. Statistics. You have no idea how your book might do until you put it out there, so don’t let the numbers stop you from trying. You might sell 500, 1,000, or 10,000 copies–who knows.

Building a loyal readership, putting efforts into marketing, and publishing a back list books to create multiple income streams are all things you can do to increase your odds of success. And, of course, writing a kick-ass story.

Whether you choose self-publishing or traditional publishing, neither road is going to be easy. They both have their advantages and disadvantages. And with either one, it’s going to be really hard to make a living as an author. This is why most authors write for the love of it, not for the money.

But if seeing your books published is your dream and passion, as it is mine, never give up. Keep publishing, keep trying, keep failing, keep learning. And most importantly, keep writing because it’s what you love.


These Savage Bones: a novella by Kaitlin HillerichMy upcoming novella, THESE SAVAGE BONES, is a YA murder mystery set in 19th century Mexico against the backdrop of the traditional festival Dia de los Muertos–the Day of the Dead.

THESE SAVAGE BONES will be released on Oct. 25th, and you can read more about the story and sign up for a publication reminder by clicking here.

signature


The Writer’s Guide to Advances and Royalties

Considering traditional publishing for your book but confused about how you'll get paid? Here's what you need to know about advances, royalties, and how to really make a living as an author.While I’ve been writing my upcoming novella, THESE SAVAGE BONES, I’ve been doing a lot of research on traditional vs. self publishing lately. Specifically, I’ve been looking into the monetary aspect of both. And let me tell you, it has definitely been eye-opening.

Today, we’re going to look at the traditional publishing side of things and explore advances, royalty rates, and just how you can make a living as a writer. But I’m going to warn you, friend, it isn’t going to be pretty. There are some cold, hard truths about publishing that you might not want to hear, but you definitely need to know.

Next week, I also plan to share a breakdown of royalties and costs from the self-publishing perspective so you can compare and contrast both options, so stay tuned for that! Now, let’s get down to it, shall we?

Spoiler alert: this post will involve math. You have been warned.

Advances

Before we get into the average royalty rates for authors from traditional publishing houses, we first need to talk about advances.

An advance is an “advanced payment” of your book’s royalties. The amount you receive depends on factors like the type of book you’re writing, how well the publisher thinks it will sell, and whether or not you’re a newbie author or a NYT best-seller.

So how much are we talking here? Literary agent Rachelle Gardner says, “A typical first-timer advance might be anywhere from $5,000 to $15,000 per book. Most publishers offer the advance they project your book will earn back in the first six to twelve months after publication.”

That might sound like a good chunk of change, but here’s the catch: you won’t receive your advance all at once. Typically, your advance is split into two payments–one when you sign your contract, and another once you turn in the final, edited manuscript–though now some publishers are beginning to split it into three installments, with the final payment being received when the book is released.

Now, if you’ve hired a literary agent (which you will most likely need to do to even get your foot in the door of traditional publishing), they will receive 15% of your advance as commission for their services. So if you receive a $10,000 advance they will receive $1,500. That being said, your agent will also help negotiate the best contract for you since it benefits them as well. Never begrudge an agent her 15%–she definitely earns it!

The other thing you need to understand about advances is that your book must earn them back before you begin receiving royalties. Yep, you read that right. That means if you received a $10,000 advance and your agent negotiated a royalty rate of $1 per book, you would need to sell 10,000 copies to earn back your advance.

And here’s the hard truth: sometimes, books don’t earn back their advance. If this happens you don’t have to repay your advance, but you’ll never receive royalties from your book and publishers will be hesitant to publish any more stories from you in the future since you just lost them money. Ouch.

Royalties

Are you still with me so far? Good! Now that we’ve covered the advance, let’s dig into the actual royalties.

First, let’s look at the timeline here. It can be up to a year or more from the time you sign your contract to the time your book hits bookstore shelves. In addition to that, remember that your book must first earn back its advance, which, on average, takes around 6-12 months. That means from the time you sign your contract, it can take two years before you receive a royalty check.

I wish I could say the news gets better, but it really doesn’t. You will only receive royalty checks every 6 months. Yep, twice a year. Talk about a sporadic paycheck.

Now, remember your literary agent? She also receives 15% of your book’s earnings for each royalty check you receive. That’s right, that 15% doesn’t just apply to your advance–it applies to all of your earnings.

So what about the royalty rates themselves? Here are the average industry royalty rates:

Hardcover: 10% before the first 10,000 copies are sold, then 15% after

Paperback: 8% for the first 150,000 copies sold, then 10% after

E-book: 25%

So how many copies can you expect to sell? That answer will vary widely and there’s no definite number, but keep in mind that in the U.S. on average, a book sells around 250 copies per year and 3,000 in its lifetime.

Let’s crunch some numbers, shall we?

Let’s say the retail price of your hardcover book is $15 and your royalty rate is 10%. That means you’ll earn $1.50 per book sold (after you earn back your advance, of course). Let’s say you’ve done well and sold 500 copies in 6 months, and you receive a royalty check of $750. After your agent’s 15% cut ($112.50), you’re left with $637.50.

Or, let’s say your paperback book is selling for $10 and your royalty rate is 8%. That means you’ll earn $0.80 cents per book. Again, let’s say you’ve done well and have sold 500 copies in 6 moths, and when your royalty check rolls around you’ve earned $400. After your agent’s 15% cut ($60), you’re left with $340.

Yep, after all the blood, sweat, tears, and countless hours you poured into your book, the publisher will get the biggest chunk of the profit. Granted, they also have to pay everyone who helped in the publishing process–the cover designer, editor, interior designer, etc.–but those percentages can still feel tiny to an author who’s put so much effort into their story.

Making a Living With Fiction

I know these numbers can be disheartening, and they make it easy to see why agents and publishers tell you not to quit your day job. The hard truth is, it’s really, really hard to make a living as an author. Successful authors like J.K. Rowling, Stephen King, and George R.R. Martin are rare exceptions, not the average author.

So how does one earn a living wage from writing fiction? Literary agent Rachelle Gardner shares the key to success:

Making money in this business, for the vast majority of writers, isn’t about having one huge hit. Or even two huge hits. Instead, it’s about building a career, book by book, and building an audience that wants more of your books.

Writers begin to see a “living wage” when they have a stack of books out there in the marketplace. Each book needs to be bringing in royalties regularly. Even if each book is not selling a huge number of copies individually—if you have a whole bunch of books out there, each selling some copies, it starts to add up.

Basically, making a living as an author isn’t a get rich quick scheme. It will take you years to build up a collection of published books that earn you enough royalties to live of off. The truth is, most writers don’t write to make millions–we write because we’re passionate about our stories and we want to share them with the world. And while passion may not pay the bills, there’s nothing quite like the reward of connecting with readers through story.

At the end of the day I don’t write for a paycheck (although it would be nice). I write because it’s what I love, and because I would continue to do so even if I never made a single sent from my work.

What about you?

P.S. Ready to explore to self-publishing side of things? Click here for Part 2 of this post!


These Savage Bones: a novella by Kaitlin HillerichMy upcoming novella, THESE SAVAGE BONES, is a YA murder mystery set in 19th century Mexico against the backdrop of the traditional festival Dia de los Muertos–the Day of the Dead.

THESE SAVAGE BONES will be released on Oct. 25th, and you can read more about the story and sign up for a publication reminder by clicking here.

signature

How to Find and Hire a Cover Designer for Your Book (+ Cover Reveal for These Savage Bones!)

One of the most important parts of self-publishing is making sure your book has a gorgeous cover. Here's what you need to know about finding and working with a cover designer!If you’ve been following the blog lately, you’ll know that I’ve been working on my first novella, THESE SAVAGE BONES. This will also be the first story I’ve self-published, so there’s a lot of exciting things going on!

And it’s about to get even more exciting, because today I’m unveiling the cover for THESE SAVAGE BONES!

Are you ready to see the cover, friend?  *begins drum roll*

TA-DA!

These Savage Bones: a novella by Kaitlin Hillerich

Now, how gorgeous is that?? *SQUEE*

I’m so, so excited with how this cover turned out, and I have to give a huge thanks to my cover designer Victoria Cooper for her amazing work!

So far, being able to have a say in the design of my cover has been my favorite part of the self-publishing process. Seeing my name on that cover for the first time was also strangely thrilling/surreal, and it’s slowly beginning to sink in that I’m actually going to have a published book out there. I’m definitely starting to feel like a real author!

THESE SAVAGE BONES will be released on October 25th, and you can read a description of the story and sign up to receive an email reminder when its published by clicking here!

Now without further ado, let’s get on with today’s topic!

Why You Need an Amazing Cover

We’ve all heard the saying “Don’t judge a book by its cover,” but unfortunately that’s exactly what readers tend to do. Humans are visual creatures, and a beautiful cover make us want to read a book even more. It creates the perception that what’s on the inside must be just as good as what’s on the outside.

You cover is going to be the reader’s first impression of your book–they’ll probably notice it before they even read the title. In a matter seconds, they will decide whether or not they want to click on your book on Amazon. If you have a gorgeous cover, they will be compelled to click and find out more about the story. But if your cover is a poorly designed eyesore, the chances are greater that they will pass over it and move on to the next book.

As unfair as all of this might sound, there’s no denying that a beautiful cover is more likely to draw in readers. You NEED to convince readers to click on your book. If they don’t, they’ll never get to your blurb or sample your first chapter or read reviews about how awesome your story is.

Your cover is your first step in convincing a reader that they need to read your book, so spending the money on a gorgeous cover is a must!

Where to Find a Cover Designer

Google is literally your best friend when it comes to finding a cover designer. I stumbled across my cover designer through a Google search, which led me to a website called The Book Cover Designer.

The website offers pre-made covers from different designers, and while I was browsing I kept noticing that all of the covers I loved were made by the same designer–Victoria Cooper. When I clicked on her profile I was excited to see she also offered custom designs in addition to her pre-made covers, which was exactly what I needed.

Which brings me to my next tip–if you see a cover you like on Amazon, check the book’s copyright page which usually credits the cover artist. Then, do a quick Google search (I told you Google was your friend!) to find out more about the designer.

Finally, a fantastic resource for finding a cover designer is this list from indie author Joanna Penn. There are a ton of cover designers listed, so it’s a great place to start your search!

What to Look For

When you’re considering a cover designer, there’s a few things you want to look for. First, browse their portfolio and make sure their work looks professional. You’ll also want to consider their style and whether or not it fits the vision you have in mind for your cover.

Additionally, look for reviews and testimonials from the designer’s customers. Was the designer easy to work with? Did they have good communication with the author? Did they finish the work on time? Look into the designer’s reputation and find out what they’re like to work with and if their customers were pleased with their work.

Consider Your Budget (But Also Consider Quality)

You can pay anywhere from fifty bucks to several thousand for a book cover. While you don’t have to spend thousands, you definitely want to invest in a good cover! I would say on average expect to pay at least around $100 for a good ebook cover (front design only), and $200-$300 for a print cover (front, back, and spine).

Of course, you will find designers who charge more or less than those figures. For example, my cover designer charges $85 for a custom ebook cover, which is a little below that estimation. But I wouldn’t be surprised if she raises her prices in the future as her work is gorgeous and I felt I was getting a high quality cover! So a lower price doesn’t always necessarily mean lower quality.

Another option to consider if you’re on a tight budget is a pre-made cover. These covers cost a little less than their custom counterparts and are made specifically for one-time sale to ensure your book is the only one with that design. Since I needed something very specific for THESE SAVAGE BONES this wasn’t a good option for me, but there are tons of gorgeous pre-made covers out there!

Book in Advance

Make sure you don’t wait until the last minute to book a cover designer if you’re getting a custom design! How far in advance will probably depend on the popularity of the designer and how many projects they currently have booked. I think I contacted my designer about a month and a half before my planned release for THESE SAVAGE BONES, but for some designers you might need to book as fear ahead as several months in advance.

You’ll also want to consider how long it will take the designer to complete the cover. I was lucky and received my finished cover in just a few days, but from what I understand the average turnaround is 2-3 weeks. The length of time will also depend on how many revisions you ask the artist to do until you’re happy with the design. Victoria communicated quickly and we only went through two drafts of the design, so that probably helped to speed up the process.

Communicating Your Vision

Sometimes, it can be hard to communicate to your designer how you’re envisioning the cover in your head. Some of the design elements you’ll want to consider are color tones, font style, layout, and imagery. You’ll also want to consider the genre of your story and the overall mood you’re trying to convey. What do you want the reader to feel when they look at your cover? The mood of a romance cover is going to be far different from that of a horror cover!

Try browsing the covers of other books in your genre for inspiration, and if you find examples of elements you really like and are looking for in your cover, show them to your designer. You can also help provide the designer with inspiration by telling them what your book is about, where it’s set, and what your main character looks like.

I would also recommend keeping an open mind as your designer might surprise you with something better than what you had originally envisioned. For example, I originally suggested a desert background for my cover, but when I saw the city background Victoria had used I ended up like it much better! That being said, don’t be afraid to also (politely!) ask the designer to make changes if there’s something you don’t like.

Additional Resources

I highly recommend this in-depth article from Reedsy to help you understand the cover design process even further. There’s also a beautiful infographic at the end of the article that sums everything up nicely!  (Hint: Save it to Pinterest for later!)


What do you think about the cover for THESE SAVAGE BONES? Please leave your thoughts in the comments below!

signature

A Simple Outline for Writing a Killer Book Blurb

Condensing a novel into a short, enticing book blurb that convinces readers to buy is no easy task. If you have no idea what to include in your blurb, this simple outline of the must-haves will help!In my last post, I mentioned that I’ve been working on a novella (and shared some reasons why you should write one of your own!). This week, I’ve been drafting a blurb to go along with said novella, and I’m finally ready to officially introduce you to the story! (Eep!)

Are you ready, friend? The title of my novella is THESE SAVAGE BONES, and here’s your first peek at the story:

Mexico, 1875. Twenty-three-year old Esperanza de la Rosa knows more about steam engines and electromagnetics than a proper lady should. Fiercely independent, she’s more interested in science and superstition than finding a suitor.

When Esperanza’s uncle is murdered during a festival celebrating the Day of the Dead, her world is shaken. To catch the killer, she must accept the help of the last person she wants to see—her ex-fiancé Alejandro Valladares, a gentleman turned bounty hunter with a troubled past.

Thrust into a tangled web of secrets and lies that threaten to destroy everything she thought she knew, Esperanza must uncover the truth and bring her uncle’s murderer to justice or the guilt of her failure will haunt her forever.

I’m pretty pumped about this story, and I’m excited to finally be sharing the details with you! So when will THESE SAVAGE BONES be available? I’m currently planning on an October 25th release. I’ll also be revealing the cover on October 1st, so stay tuned! (Spoiler alert: it’s amazingly gorgeous).

I’m not gonna lie though, writing that blurb was hard. Which is why today I want to share with you what I learned about writing a blurb so that hopefully you’ll have an easier time of it than I did!

What is a Book Blurb?

A blurb is the description of the story found on the back cover of a book. It’s brief–no more than 100-150 words–and creates interest in the story without giving away major spoilers or the ending.

Basically, the name of the game with a blurb is to entice readers to buy your book. Now, that’s a lot of pressure to condense a 50,000+ word novel into 150 words or less in a way that will convince readers to buy. Where do you even begin?

There are many different ways to write & organize a book blurb, but today I’m going to try to simplify the process for you by breaking it down into two main sections: 1) The hero before the story’s issue, and 2) The hero after the issue is introduced. In both sections, I’ll share the must-haves you’ll need to include to make your blurb work.

Sound like a plan? Let’s get started!

Part 1: Set the Stage

This part of the blurb is a quick snapshot that shows “the calm before the storm” before the hero’s life is turned upside down. It introduces a) the hero, b) the setting, and c) the hero’s life before the story begins.

A. The Hero

When you introduce your hero in your blurb, you want to accomplish two things: 1) give the reader a feel for what the hero is like, and 2) create interest in the hero.

To quickly acquaint the reader with your hero, mention his profession and/or the role he identifies with. Is he a police officer? Retired soldier? Stay-at-home father? Starving artist? College student?  Also, try to use adjectives to sum up what your character is like such as adventurous, street-smart, reckless, outcast, etc.

Next, you want to highlight the most interesting aspects of your hero. Is he a starving artist by day and a master art forger by night? Is he hiding magical powers? Is he on the high school football team but secretly practices ballet? Let readers know what makes him stand out!

Here are some examples of character description in book blurbs:

“Cinder, a gifted mechanic, is a cyborg.” (Cinder by Marissa Meyer)

“Lena Duchannes is unlike anyone the small Southern town of Gatlin has ever seen, and she’s struggling to conceal her power, and a curse that has haunted her family for generations.” (Beautiful Creatures by Kami Garcia and Margaret Stohl)

“Art student and monster’s apprentice Karou finally has the answers she has always sought.” (Days of Blood and Starlight by Laini Taylor)

“Known among locals as the daughter of a brothel prostitute, Josie wants more out of life than the Big Easy has to offer.” (Out of the Easy by Ruta Sepetys)

B. The Setting

You don’t have to mention the setting, but it can help set the mood for your book and also attract readers with an interest in that setting.

The only exception to this is if you’re writing historical fiction or fantasy—then including the setting in your blurb is a must. For historical fiction, you’ll want to mention the time-period and place, and with fantasy you’ll need to introduce the reader to the world you’ve created. Here are a few examples.

Fantasy Settings

“In the ruins of a place once known as North America lies the nation of Panem, a shining Capitol surrounded by twelve outlying districts.” (The Hunger Games by Suzanne Collins)

“Humans and androids crowd the raucous streets of New Beijing. A deadly plague ravages the population. From space, a ruthless lunar people watch, waiting to make their move.” (Cinder by Marissa Meyer)

“But even within the overgrown gardens, murky swamps and crumbling graveyards of the forgotten South, a secret cannot stay hidden forever.” (Beautiful Creatures by Kami Garcia and Margaret Stohl)

Historical Fiction Settings

“It’s 1950, and as the French Quarter of New Orleans simmers with secrets, seventeen-year-old Josie Moraine is silently stirring a pot of her own.” (Out of the Easy by Ruta Sepetys)

“It is 1939. Nazi Germany. The country is holding its breath. Death has never been busier, and will become busier still.” (The Book Thief by Markus Zusak)

“World War II is drawing to a close in East Prussia and thousands of refugees are on a desperate trek toward freedom, many with something to hide.” (Salt to the Sea by Ruta Sepetys)

C. Current Situation in Life, Dreams, Desires, etc.

This is optional, but you could provide the reader with a quick snapshot of what the hero’s life is like before the story begins. Do they have a perfect life with everything they’ve ever wanted before it’s suddenly torn away? Do they have plans to attend an Ivy League school before those hopes are suddenly dashed?

Revealing these sorts of details can provide a nice contrast to the disaster that’s about to befall the hero, help characterize the hero, and create sympathy in the reader. Consider whether your hero’s “before” might be worth mentioning.

For example, in the blurb from Cinder, look at the second sentence that goes on to further describe our heroine:

“Cinder, a gifted mechanic, is a cyborg. She’s a second-class citizen with a mysterious past, reviled by her stepmother and blamed for her stepsister’s illness.”

This snippet gives us a little peek into what Cinder’s life is currently like, and it’s pretty dismal. This helps create sympathy in the reader and already puts us on Cinder’s side.

Part 2: Introduce the Problem

This part of the blurb is the big “But when…” that a) reveals the problem that’s about to turn the hero’s life upside down and thus begin our story. It also lets the reader know b) what the hero is setting out to accomplish, c) what opposition or obstacles are standing in his way, and d) what’s at stake. Let’s look at a few examples.

Example 1: “But when her life becomes intertwined with the handsome Prince Kai’s, she suddenly finds herself at the center of an intergalactic struggle, and a forbidden attraction. Caught between duty and freedom, loyalty and betrayal, she must uncover secrets about her past in order to protect her world’s future.” (Cinder by Marissa Meyer)

A. What’s the problem? Cinder is mixed up in an “intergalactic struggle” and a “forbidden attraction.”

B. What’s her goal? “She must uncover secrets about her past in order to protect her world’s future.”

C. What’s standing in her way? She’s “caught between duty and freedom, loyalty and betrayal.”

D. What’s at stake? “Her world’s future.”

Example 2: “Sixteen-year-old Katniss Everdeen, who lives alone with her mother and younger sister, regards it as a death sentence when she is forced to represent her district in the Games. The terrain, rules, and level of audience participation may change but one thing is constant: kill or be killed.  (The Hunger Games by Suzanne Collins)

A. What’s the problem? Katniss is “forced to represent her district in the Games.”

B. What’s her goal? Surviving and winning the games.

C. What’s standing in her way? She must “kill or be killed,” and the blurb hints that the changing terrain and rules as well as the audience might also pose obstacles.

D. What’s at stake? Katniss’ life.

Example 3: “Kaz is offered a chance at a deadly heist that could make him rich beyond his wildest dreams. But he can’t pull it off alone… Six dangerous outcasts. One impossible heist. Kaz’s crew is the only thing that might stand between the world and destruction―if they don’t kill each other first.” (Six of Crows by Leigh Bardugo)

A. What’s the problem? Kaz needs to assemble a crew to pull off a “deadly heist.”

B. What’s his goal? Pulling off the heist and becoming rich.

C. What’s standing in his way? The heist is described as “deadly” and “impossible” which suggests this won’t be easy. It’s also implied there will be internal conflict within the band of criminals with the line “if they don’t kill each other first.”

D. What’s at stake? If he succeeds, the heist will make Kaz “rich beyond his wildest dreams.”  On the other hand, “Kaz’s crew is the only thing that might stand between the world and destruction.”

Condensing a novel into a short, enticing book blurb that convinces readers to buy is no easy task. If you have no idea what to include in your blurb, this simple outline of the must-haves will help!Whatever information you choose to include in your blurb, just make sure you keep it short and sweet and arouse the reader’s curiosity.

Remember, the blurb is about teasing readers with your story and enticing them to (hopefully) buy. You don’t have to include every detail, but make sure you include just enough to get readers itching to pick up your book.

Also, I would LOVE to hear your thoughts on my blurb for THESE SAVAGE BONES! Does it make you interested to read the story? Let me know in the comments below!

signature

5 Reasons Why You Should Write a Novella

The popularity of novellas is growing. Discover 5 reasons why you should write a novella of your own!Over the past several weeks or so, I’ve been experimenting with a form of fiction I’ve never tried before: the novella. If you don’t already know, a novella runs between 20,000 and 40,000 words, and can be read in a couple of sittings. It’s like a longish short story for writers who suck at keeping short stories short (aka me).

Writers usually avoid novellas because publishers typically don’t want them. Not because there isn’t a market for them, but because they’re not as cost-effective for the publisher as a full-length novel. And as we all know, at the end of the day publishing is a business.

But with the advent of self-publishing and the digital age, the publishing world is changing. Writers can now bypass traditional publishing houses and publish novellas themselves inexpensively in the form of e-books. This means we can now target that market of readers who enjoy novellas that we couldn’t reach before.

And that’s pretty cool, especially since novellas are growing in popularity. Still not convinced? Read on to learn the benefits of writing a novella, and maybe you’ll even decide to write one yourself!

1. Explore New Ideas

If you’re like me, you probably have quite a few ideas for stories. I currently have a running list of around 20-something ideas I’m itching to explore. But alas, as much as it pains me to admit, I know I will only be able to write so many novels in my lifetime.

So what’s a writer to do? One option would be to turn some of those ideas into short stories. But again, if you’re like me you probably suck at writing them. There’s just so much to explore, and not enough time or page space in a short story. Novellas, on the other hand, allow you to go more in-depth with plot and characters without committing to a full-length novel.

This is great if you need to get an idea out of your system, or need take a break from a series and write something different between installments. You could also write a novella between drafts of a novel. Have an idea that’s too long to be a short story but too short to be a novel? Instead of throwing it away, turn it into a novella.

Not only do novellas take less time to write and allow you to get some plot bunnies out of your head, but they also give your readers something to snack on while waiting for your next novel. Sounds like a win to me!

2. Expand on Your Novel

One great use for novellas is to expand on your novel or series. Maybe there’s a character whose story you want to explore further, or maybe you want to write a prequel about what takes place before the novel. Or, maybe you want to write a story set in the fantasy world you created but follow a different set of characters than your novel.

There are a lot of fun options you could explore! Plus, your readers will love it. Fans of your novel or series will enjoy being able to delve deeper into their favorite characters or explore other parts of your fantasy world. A novella will allow those who don’t wish to leave your story to linger a little longer even after they’ve finished your novel.

3. Build a Readership

Novellas can be a great way to build your readership. You could self-publish a novella (or several) before publishing your novel. Putting your work out there will help you find readers who will love your stuff–and you! If they enjoy your novella they’ll likely become interested in what you write next.

Besides building interest in your work in general, you can also use novellas to build interest around a specific novel. For example, consider writing a novella that’s a prequel to your novel or is set in the same world if you’re writing a fantasy. This will help you find readers who will be interested in your novel before it’s even published!

Additionally, after your novel is published you could continue to use that novella as a way to gain new readers by offering it for free. If readers get hooked on your free novella, they’ll likely buy your novel!

4. Create an Additional Stream of Income

One of the sad truths about being an author is that it’s hard to make a living writing fiction, though it certainly isn’t impossible. More and more now, authors are choosing to self-publish novellas (or even novels) after being traditionally published.

Why?

Well, not only is an author’s advance split into two or three installments that could be spread out over a period of time as long as a year, but after publication an author only receives a royalty check twice a year. Not to mention, after your book is published it must earn back its advance before you start receiving royalties. Which means it’ll be a while before you see that first royalty check.

Talk about a sporadic paycheck.

Self-publishing means you have control over when and how often you decide to publish. And with a platform like Amazon’s Kindle Direct Publishing, you receive a monthly royalty check  which means a steadier income. You’ll also get a bigger cut of the profits versus what you’ll receive from a traditional publisher.

Of course, to build a decent income stream off of novellas you’ll need to write a handful. But considering they take less time to write than a novel, it’s not such a bad strategy. You’ll be able to put work out faster, and the more stories you get out there the more opportunities you have to attract readers. Novellas offer an additional income stream while growing your audience, which means more buyers for your future books.

5. Appeal to Busy Readers

If you haven’t already noticed, people nowadays lead busy lives and have short attention spans. Most people would rather invest a couple hours into watching a movie than days or weeks reading a book.

Also, since it seems every book is now part of a series, this means an even bigger investment of time. A reader might be reluctant to make that kind of commitment. If they don’t have time to read one book, how are they going to read three, or five, or eight? And no one likes to be left hanging on a story.

Novelist and screenwriter Ian McEwan said in an article in The New Yorker that, “To sit with a novella is analogous to watching a play or a longish movie.” There are plenty of people out there (including myself) who love to read but struggle to find the time, yet most of us can squeeze in a movie here or there.

Novellas are a perfect option for busy readers because they can be finished in one or two sittings and have a little more meat to them than a short story. This allows reader to enjoy a great story without having to make a huge time commitment–just like watching a movie.


So, have I convinced you to try writing a novella of your own? I’ll confess, I’m having quite a bit of fun writing mine. It’s a murder mystery which is something I’ve never written before, and it’s nice to be able to explore a new genre and idea without committing a year or longer to writing a full-length novel.

I do plan to self-publish this novella, and I hope I’ll be able to share it with you soon! Until then, have you read or written any novellas yourself? I’d love to hear your thoughts and recommendations–pop them into the comments below!

signature